Belts
Belts drive joints 1, 3, 4 and 5. Over time they stretch a little and the joint loses stiffness; a belt that slips a tooth loses the robot's position.
Tension
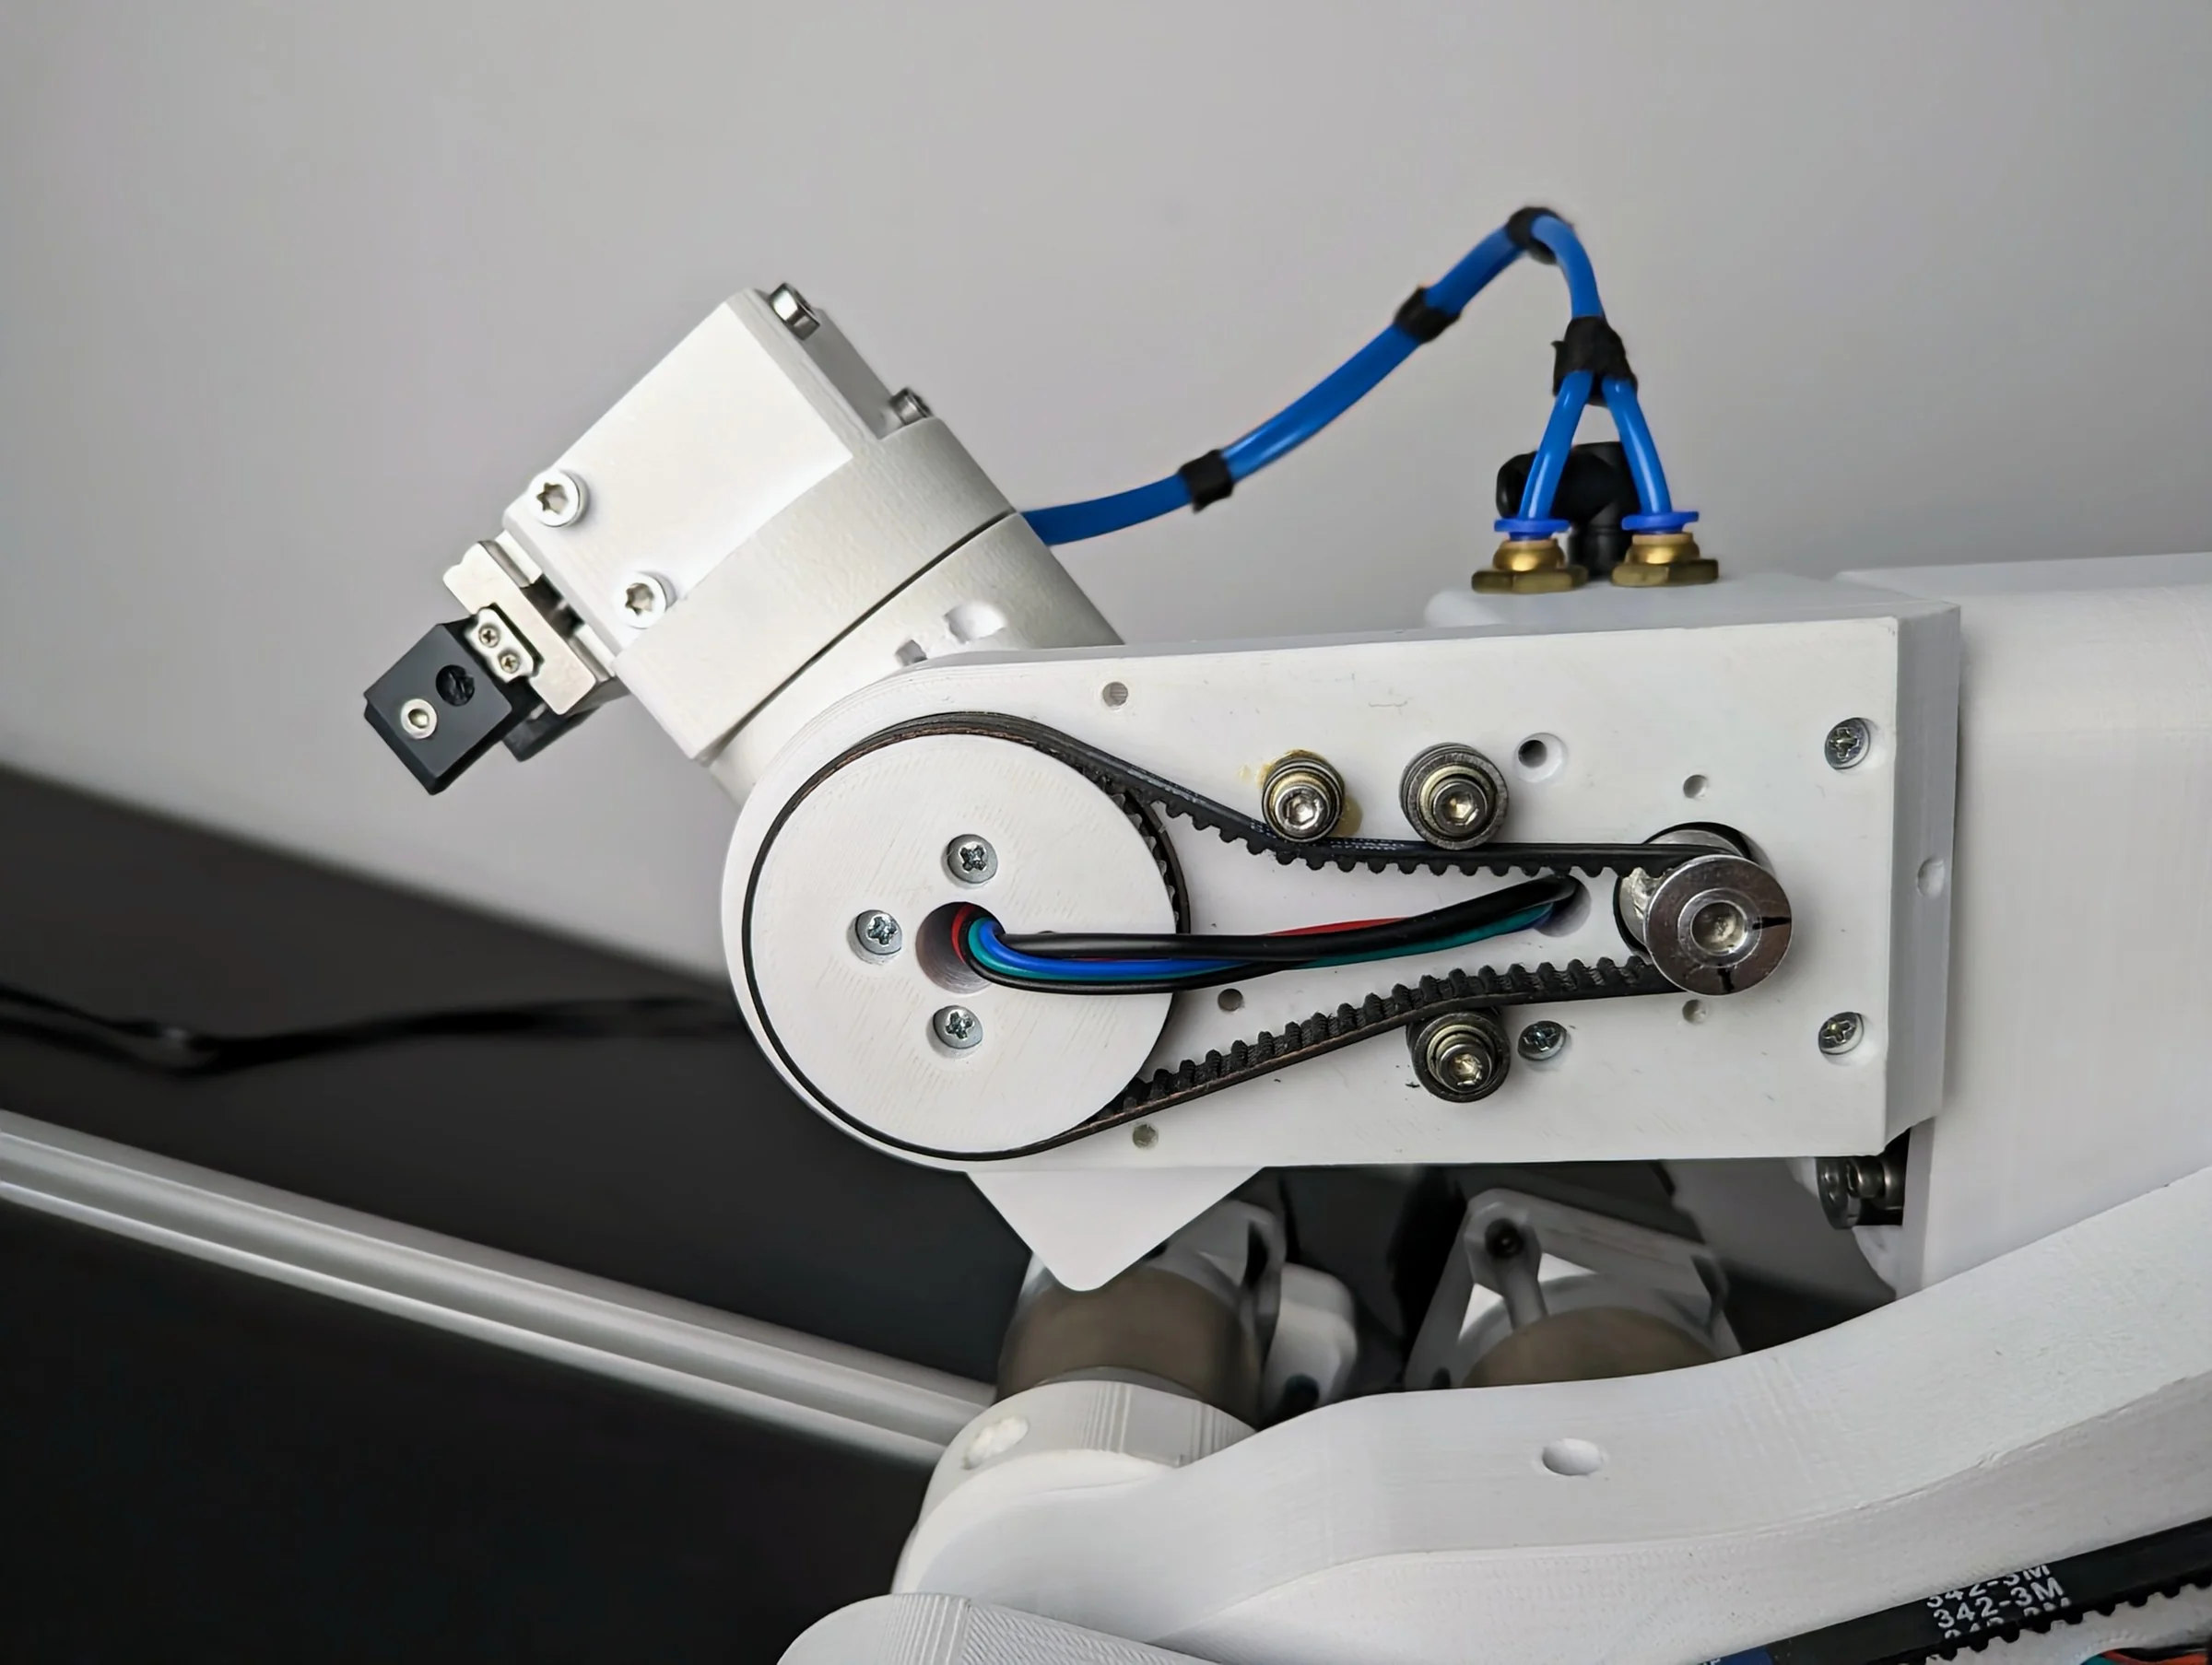
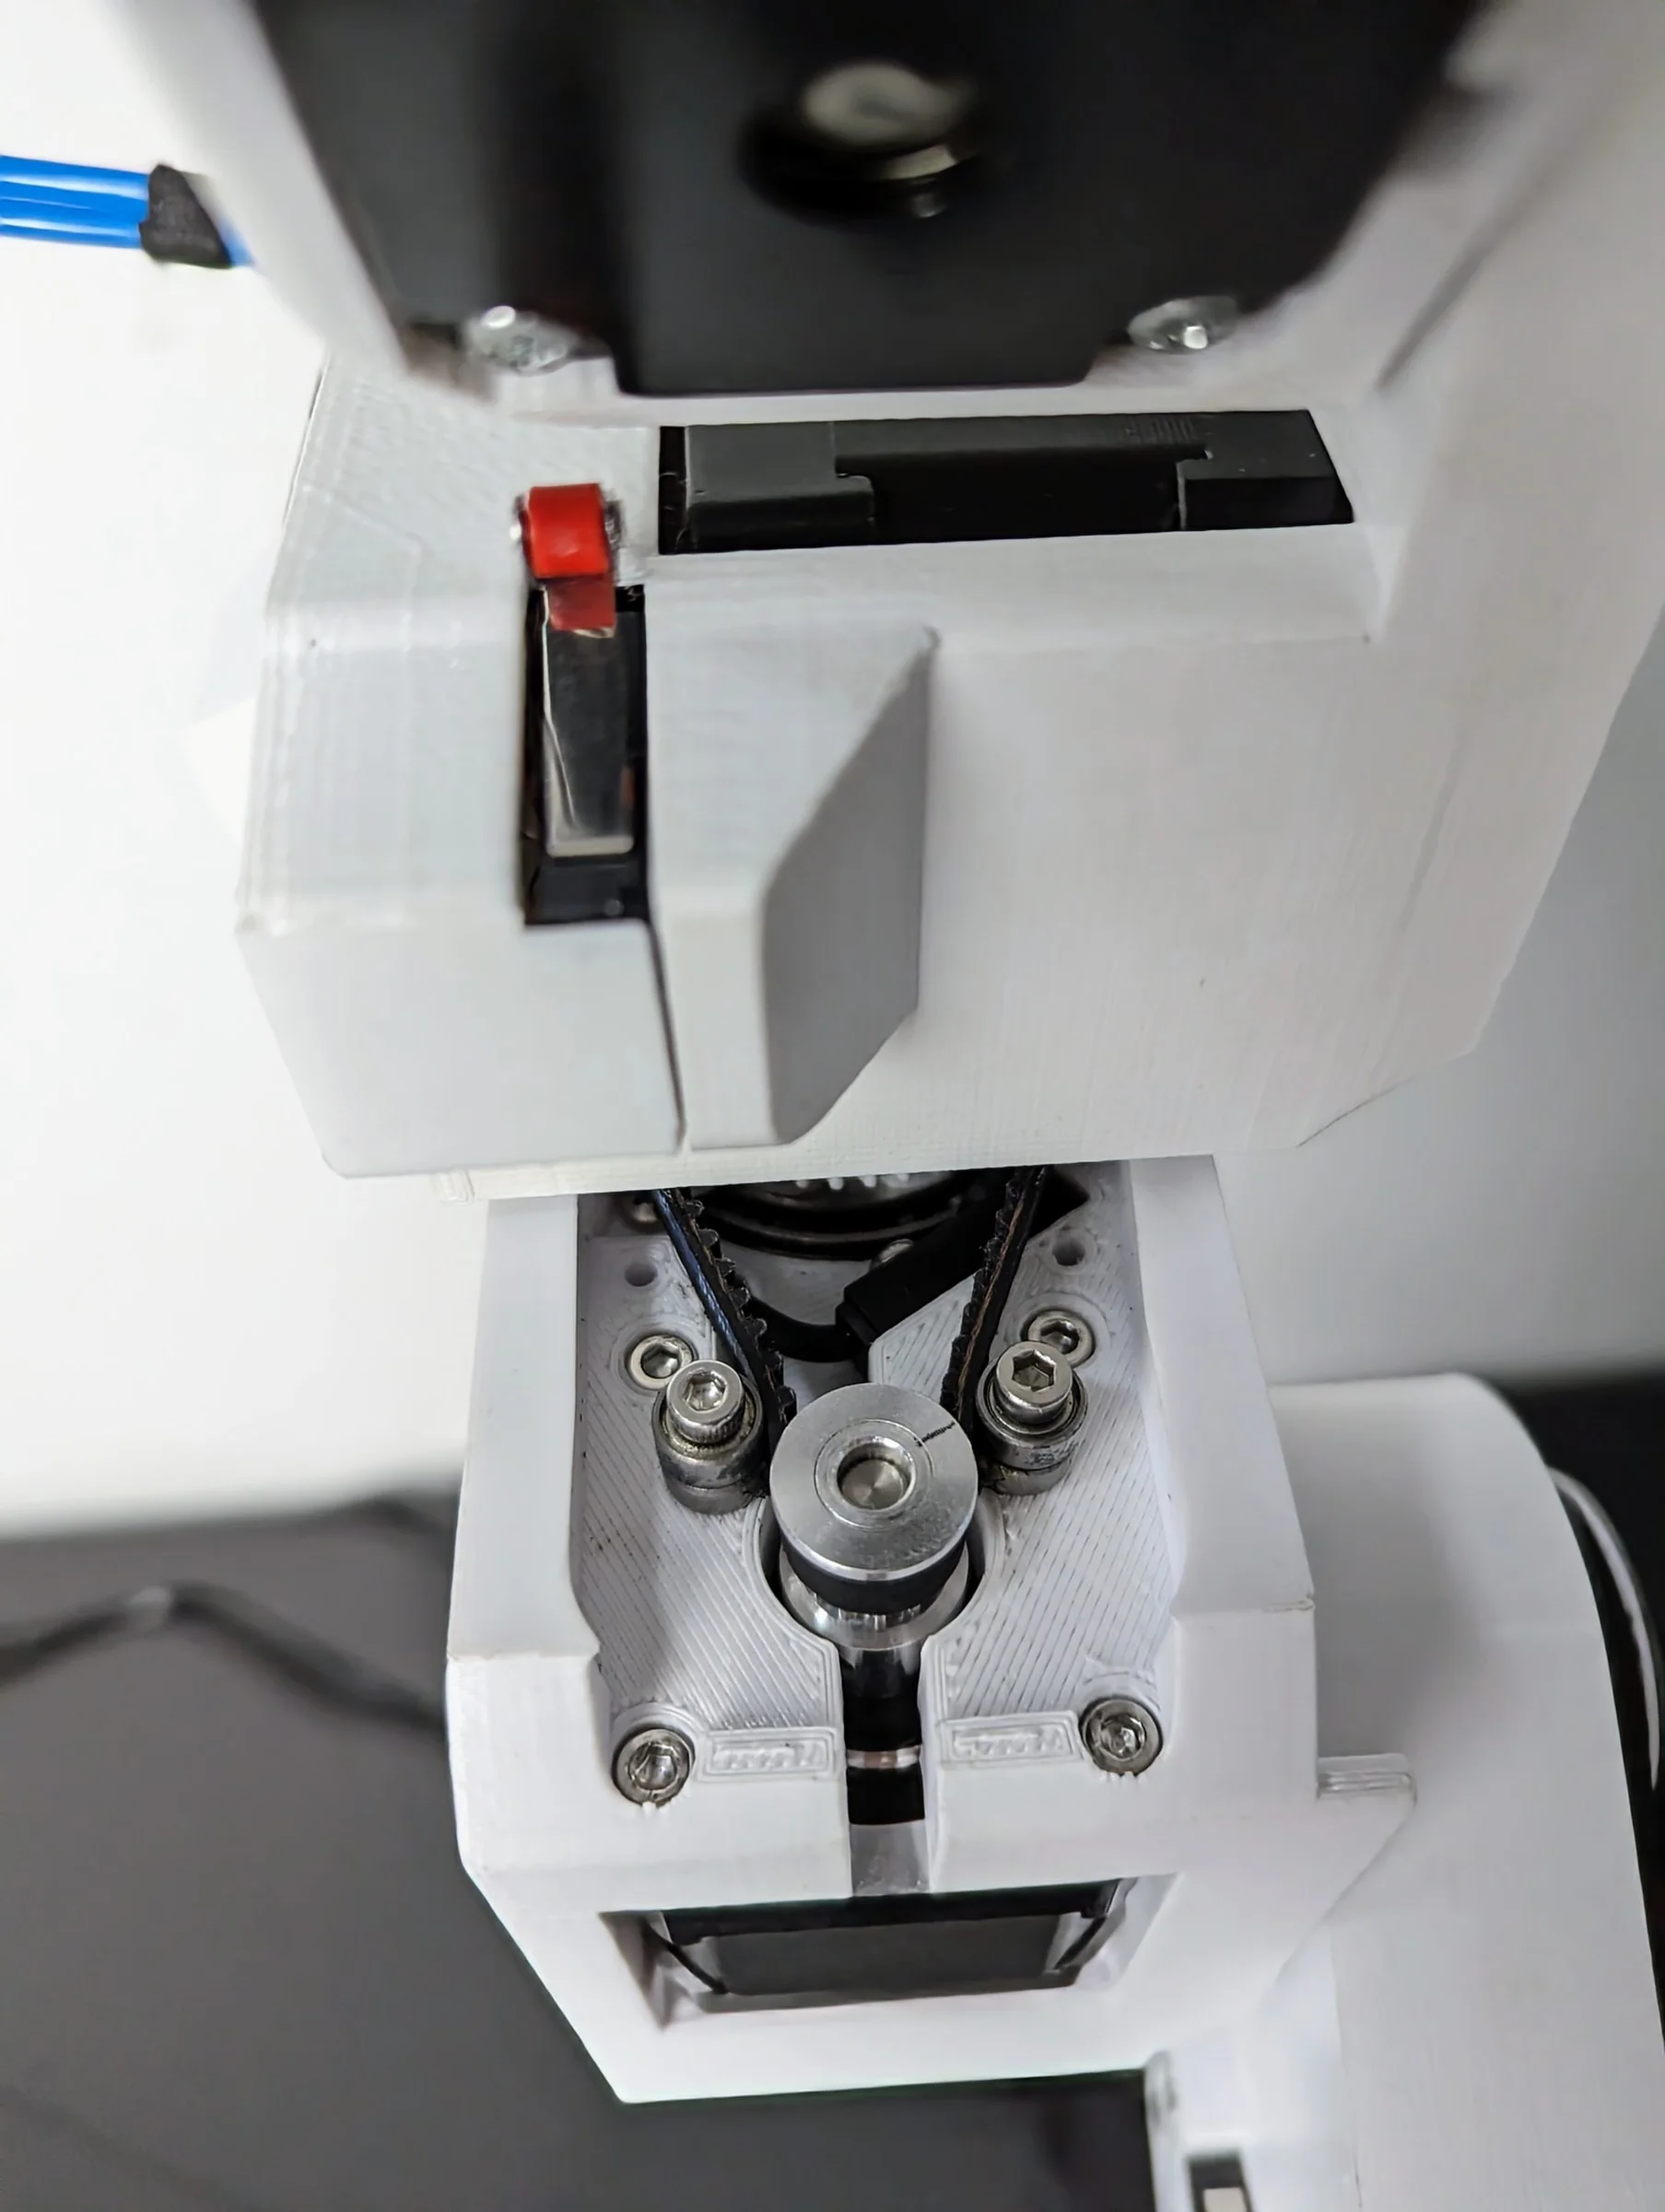
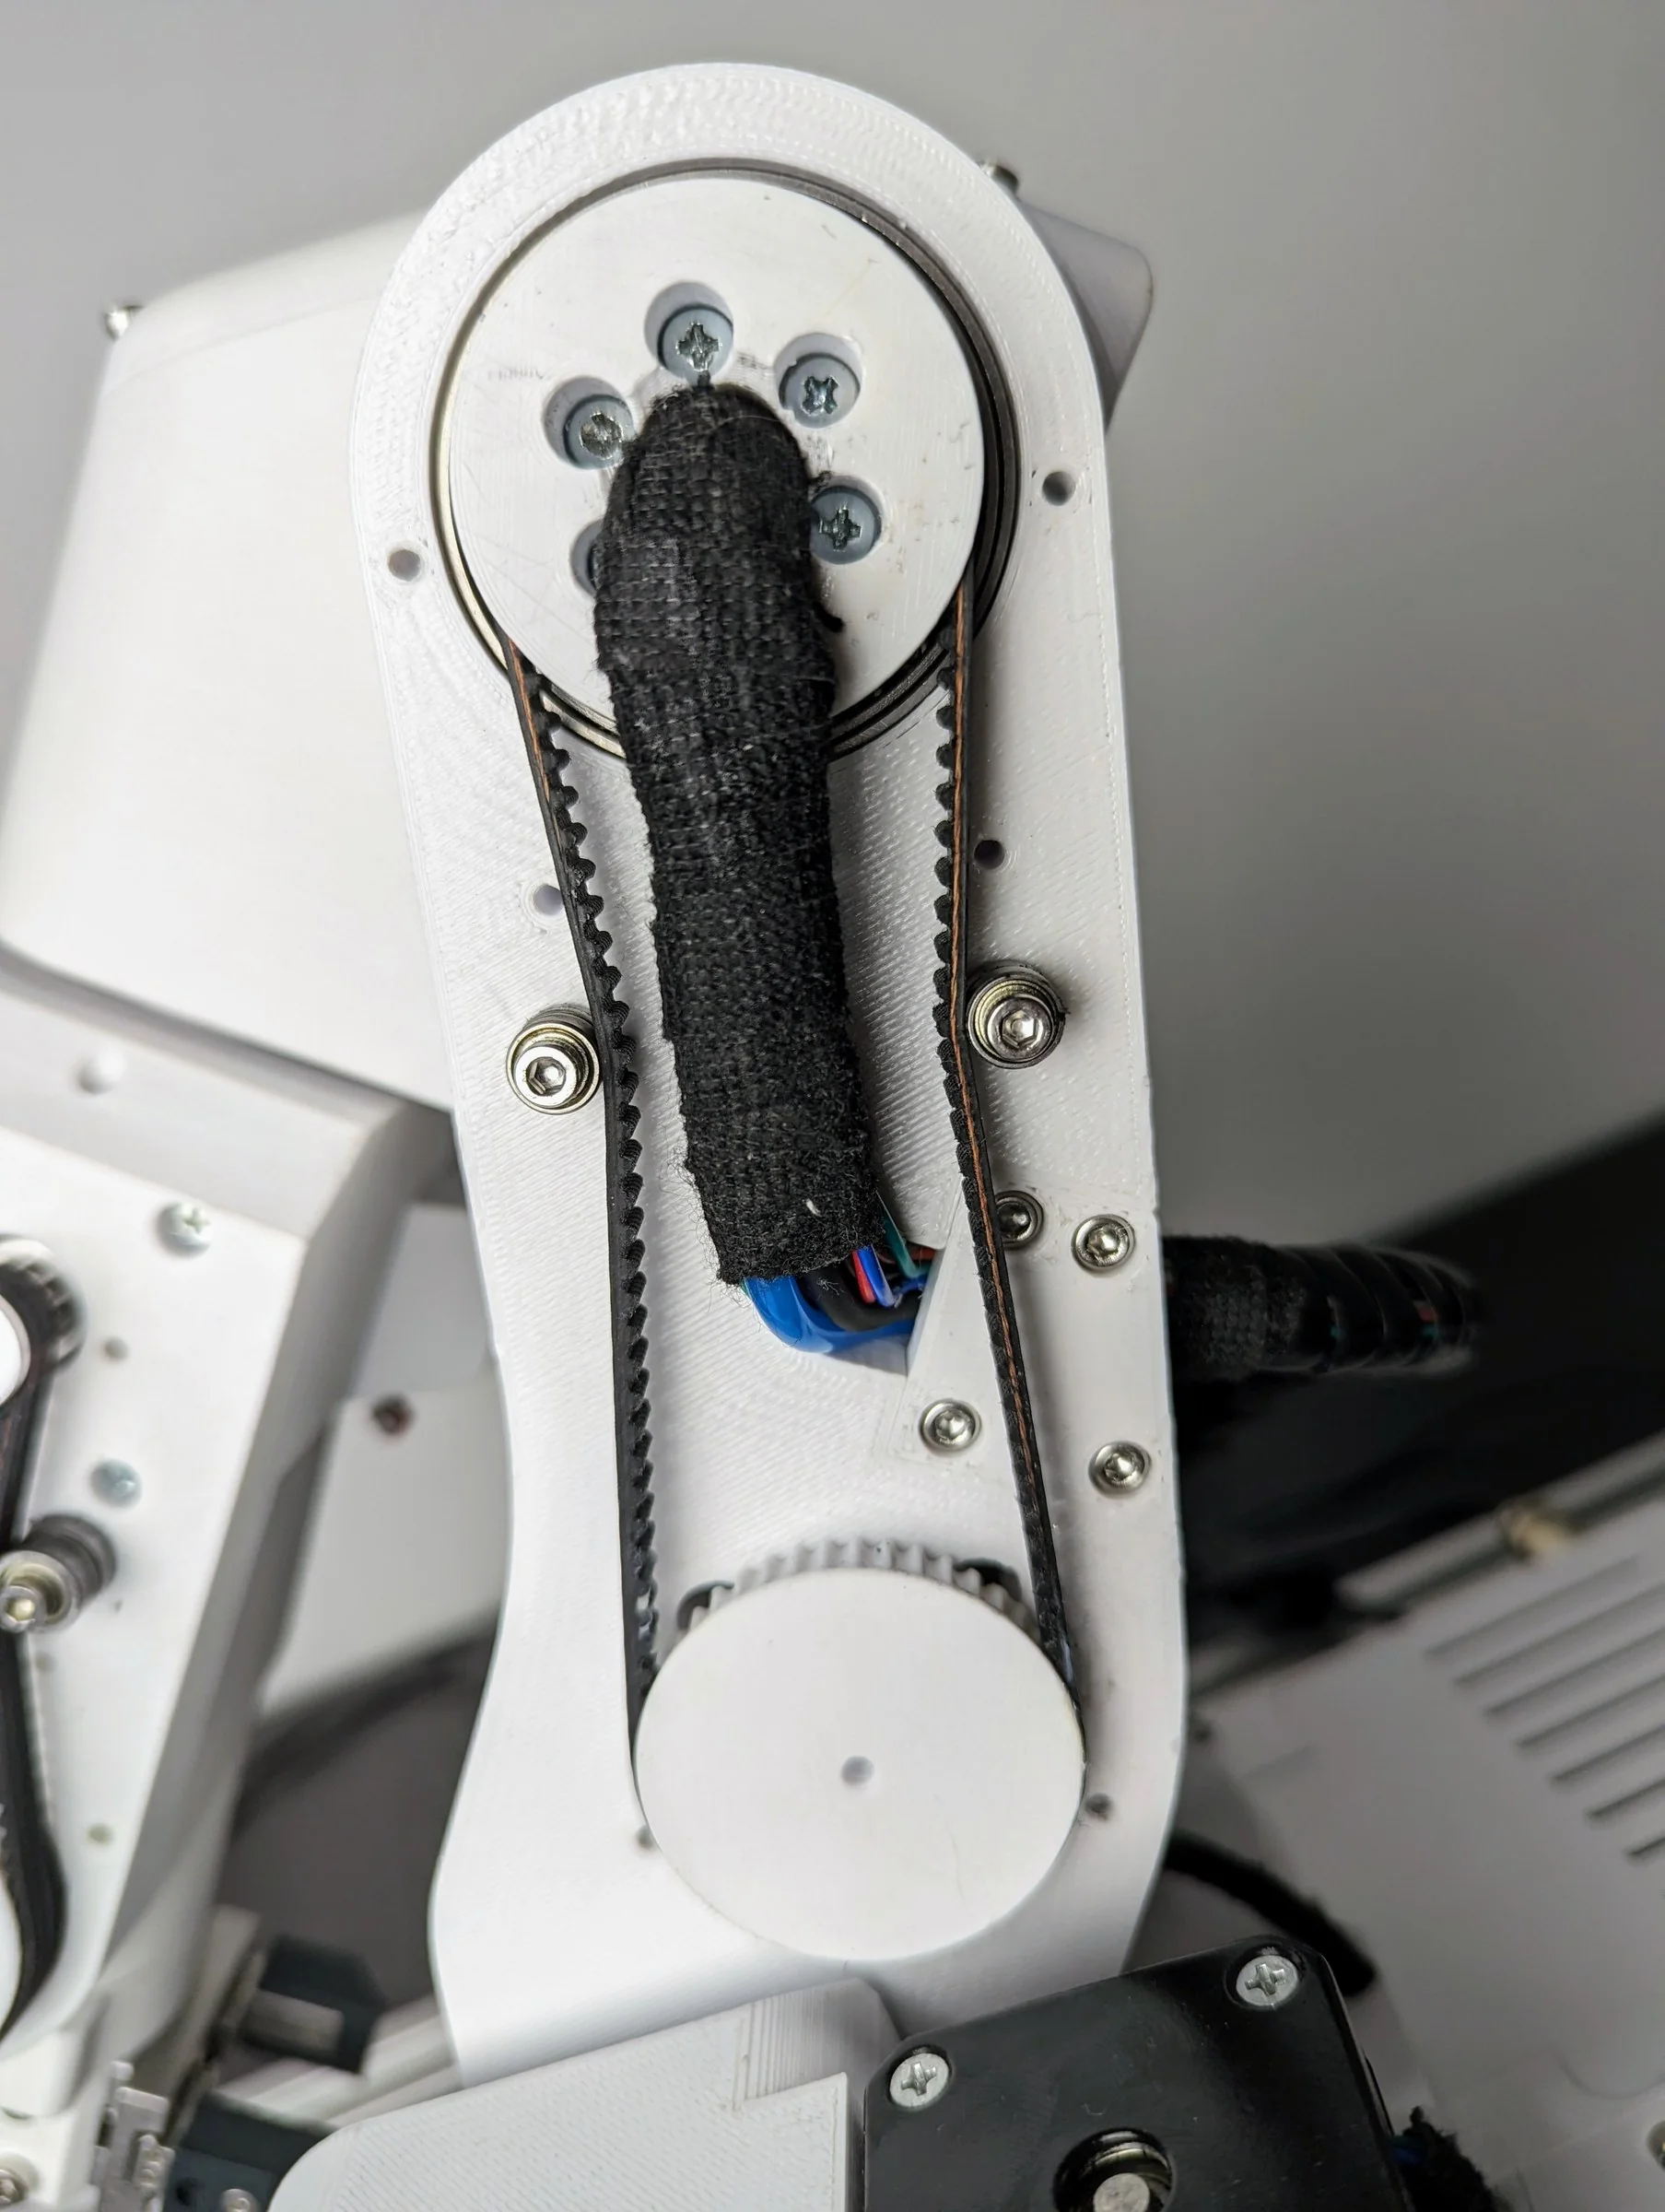
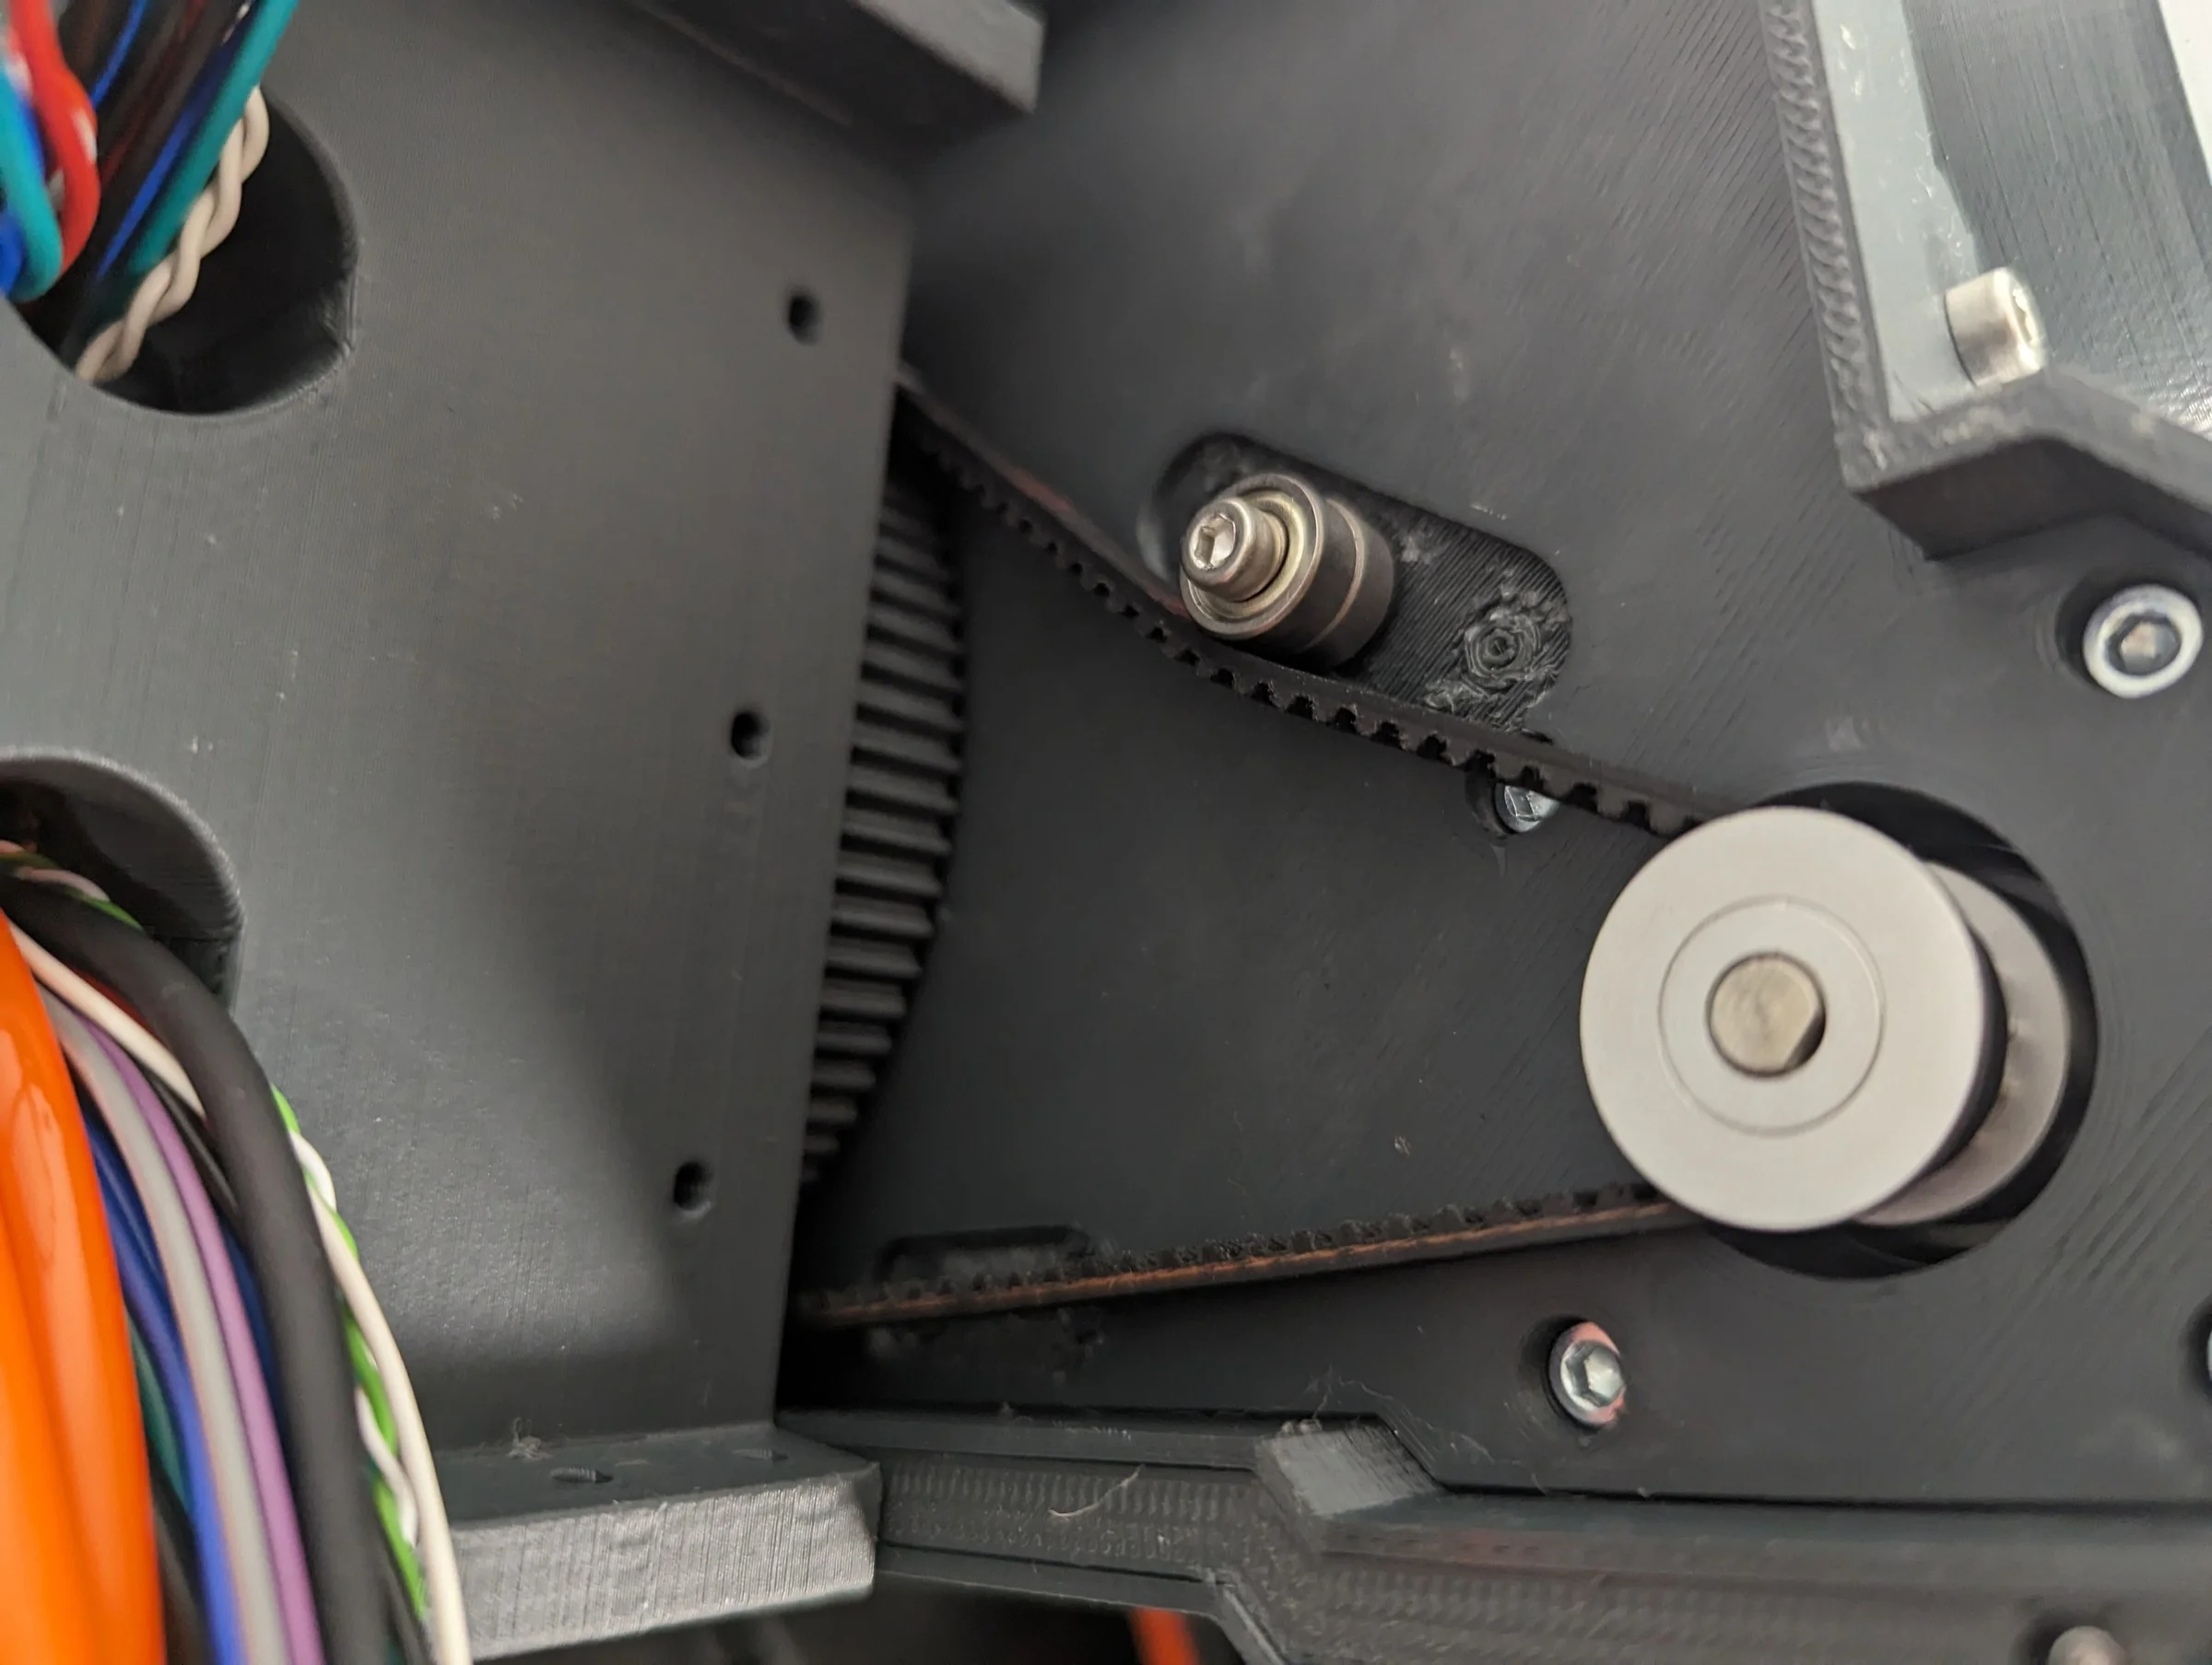
The reference is the belt tension video: in it, maximum hand force is applied to the belt, and that is the tension to aim for on joints 3 and 5. Joints 1 and 4 take slightly less. A belt is tensioned by adding or moving the small tension bearings (3 × 8 × 4 mm and 3 × 10 × 4 mm) that press on its back; if a belt is not tight enough, add another bearing as in the photos. You may or may not need a tensioner on a given joint: it depends on your belts and printed parts, so fit one only where the belt is not tight enough without it.
Joint 5 belt
Joint 4 belt
Joint 3 belt
Joint 1 belt
Grease
A thin film of grease on the belts' teeth reduces noise and wear. Reapply when it dries out.
Replacement
| Joint | Belt |
|---|---|
| Joint 1 | HTD3 396 mm, 6 mm wide |
| Joint 3 | HTD3 342 mm |
| Joint 4 | HTD3 201 mm |
| Joint 5 | HTD3 246 mm |
Replacing a belt means opening the joint as in the assembly manual; afterwards home the robot and check the witness marks, and master if they do not line up.
Comments
Found a mistake on this page? Edit it on GitHub · Report it · Get help · This page as Markdown · llms.txt · The whole manual as PDF