Homing
After power-up the robot does not know where its joints are: the motors count steps, and the count starts at zero wherever the arm happens to stand. Homing gives each joint a reference by driving it to its limit switch or sensor, then moving a known number of steps to the after-homing pose. It must be done after every power-up, and again after a collision, a stall or any move by hand.
Before you press Home
- The arm can move freely to every limit: nothing on the table in the way, no cable caught.
- The tool is mounted: joint 5 homes against the tool's feature on the SSG-48 and the pneumatic gripper, and the homing offset in the firmware matches the tool (Joint 5 and the tool, SSG-48).
- Joint 6 stands so that it finds its sensor within one turn in the negative direction, with the cables and tubes not already wound up. The figure shows the pose: the gripper as drawn, the sensor (blue) and the homing pin (red); joint 6 turns along the green arrow.
- You are at the E-stop.
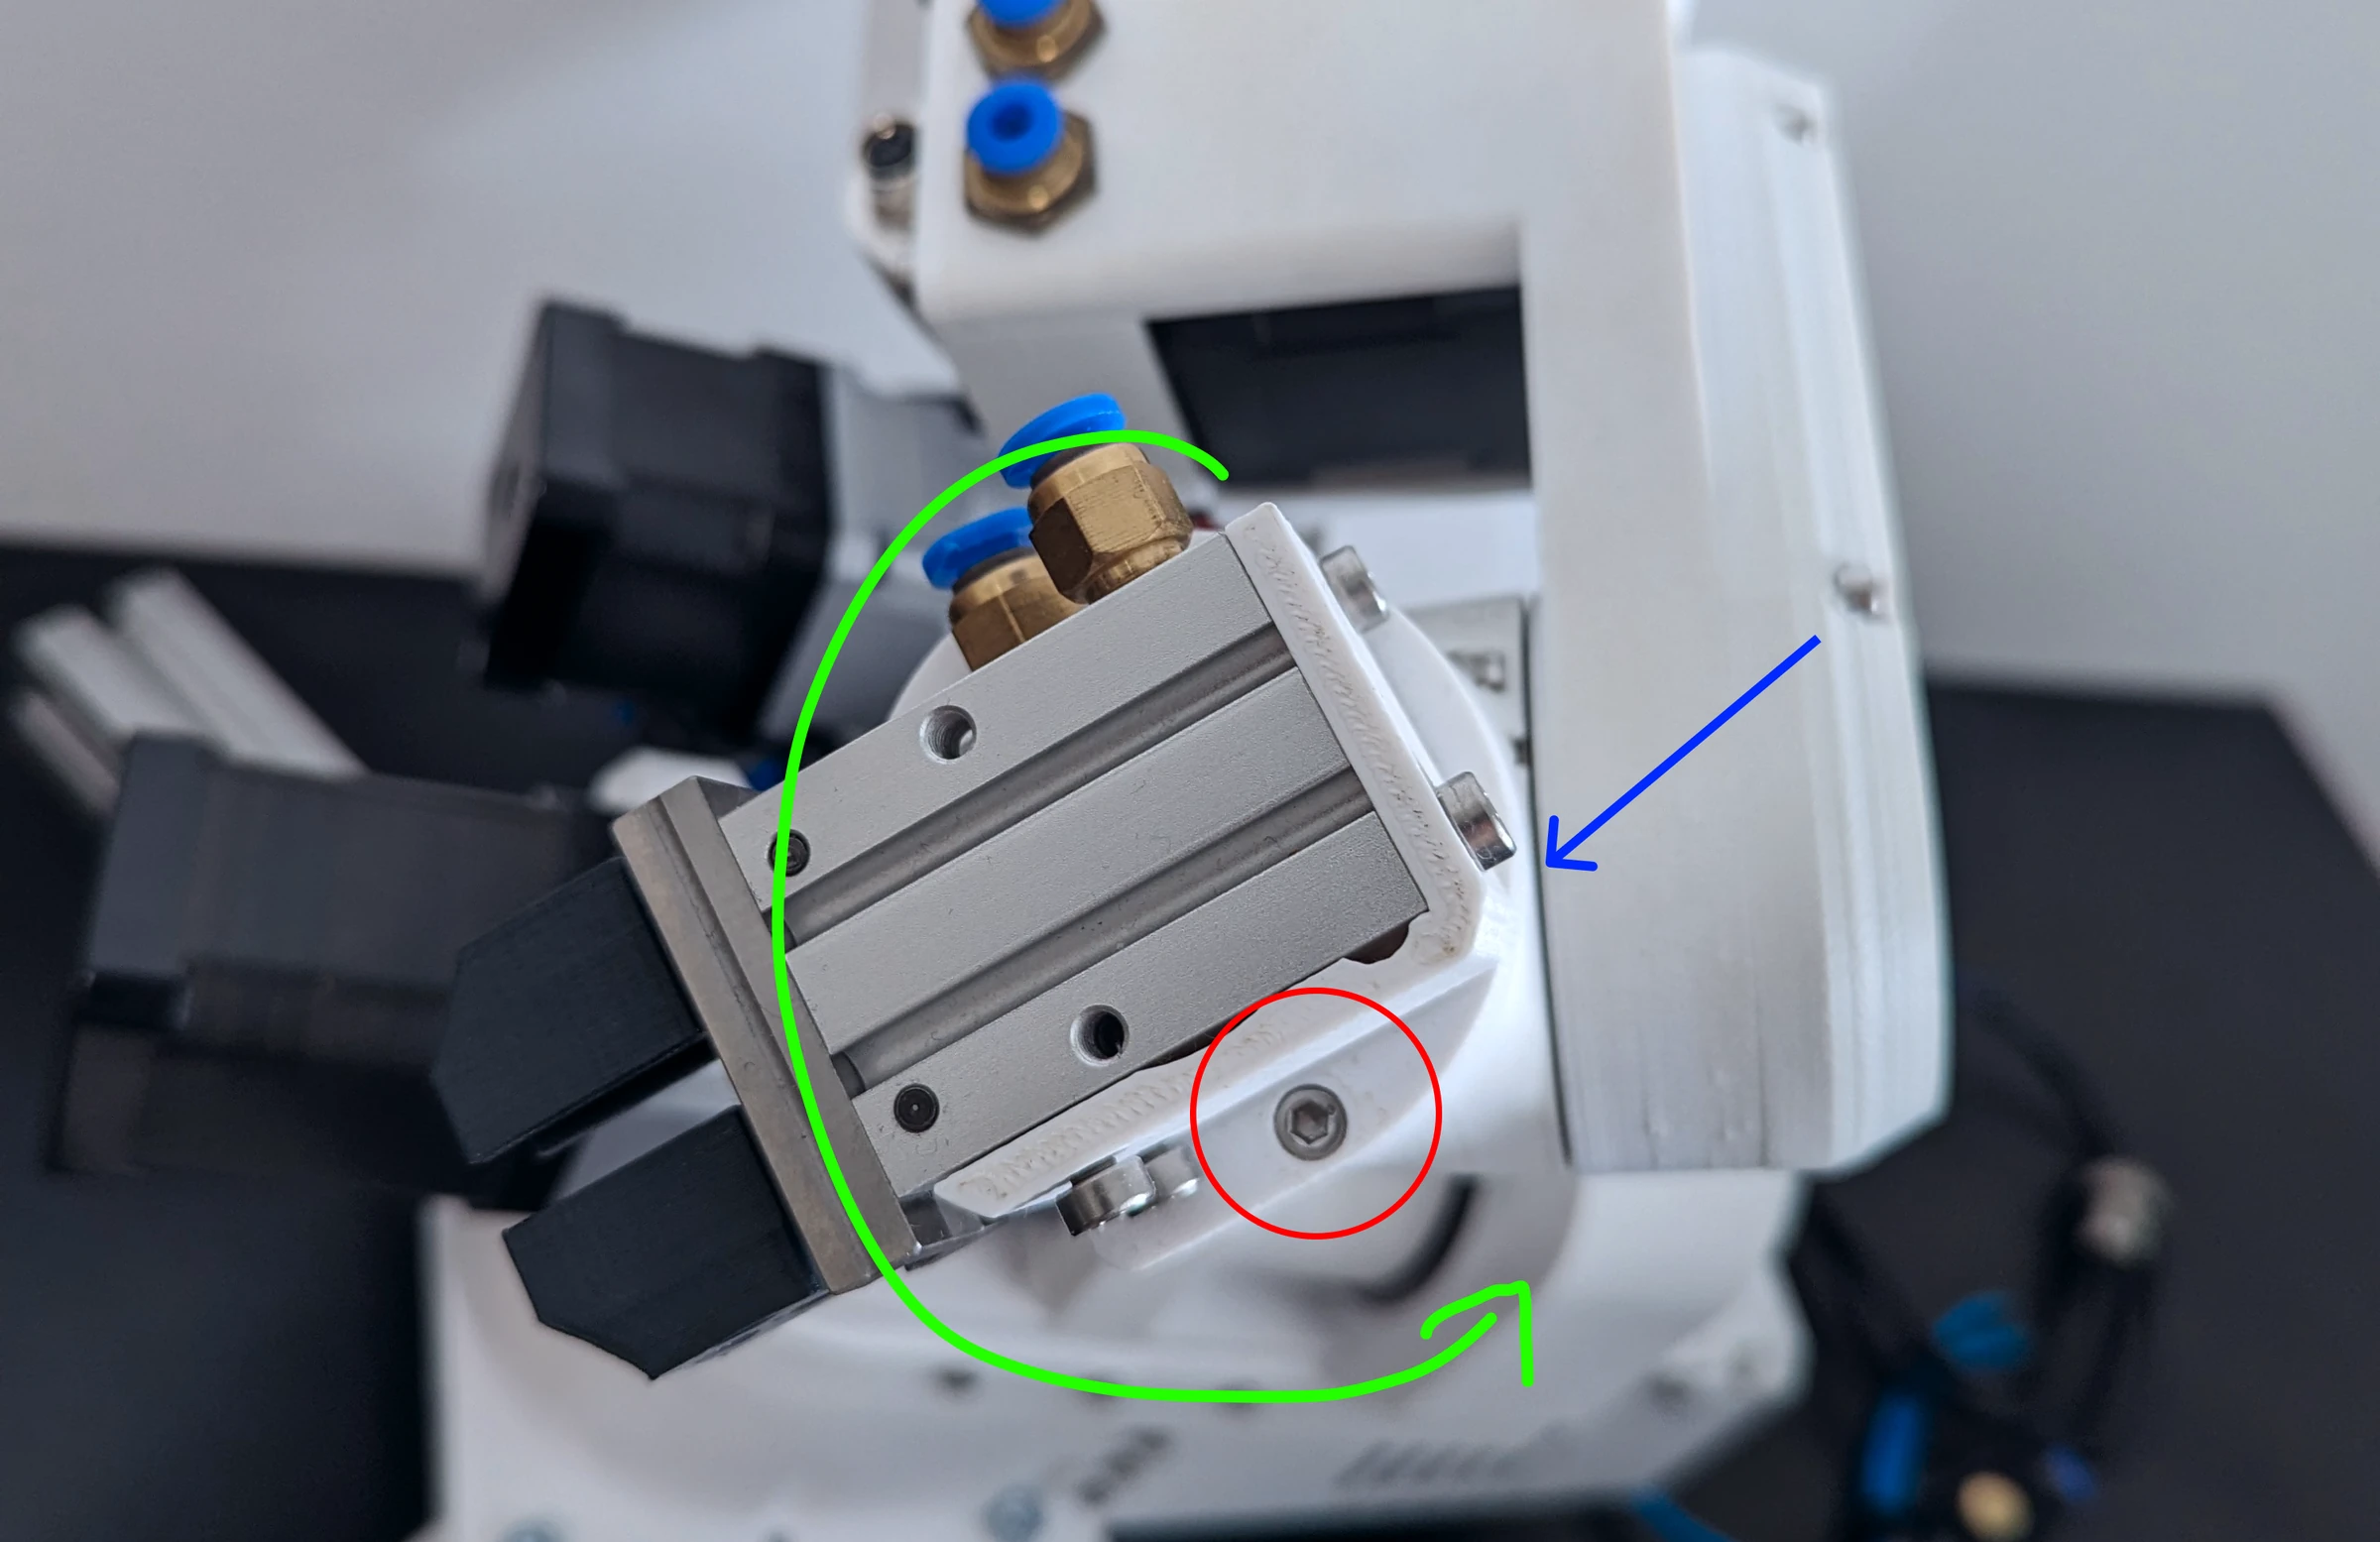
The sequence
The firmware runs the sequence; the PC only starts it and watches.
flowchart TD
    S([Home]) --> A[Joints 1, 2 and 3 drive together to their sensor and switches]
    A --> B[Each backs off about a thousand steps and approaches again slowly:<br>the second trigger is the reference]
    B --> C[Joints 1, 2 and 3 move to their after-homing positions]
    C --> D[Joint 4: the same against its inductive sensor, then its after-homing position]
    D --> E[Joint 6 turns in the negative direction until its sensor sees the pin,<br>backs off, re-approaches, moves on so that joint 5 can home]
    E --> F[Joint 5 homes against its switch]
    F --> G[Joints 5 and 6 move to their after-homing positions together]
G --> H([Every counter set to its after-homing value: six joints homed])- Joints 1, 2 and 3 move together toward their switches: joint 1 to its inductive sensor, joints 2 and 3 to their limit switches. Each stops when it triggers.
- Each backs off, 850 steps on joint 1 and 1050 on joints 2 and 3, and approaches again slowly, and the position where it triggers the second time is the reference: the first hit may have pressed the switch too far.
- Joints 1, 2 and 3 move from the reference to their after-homing positions (13500, 19588 and 23020 steps away).
- Joint 4 does the same against its inductive sensor (backing off 1550 steps) and moves to its after-homing position.
- Joint 6 turns in the negative direction until its sensor sees the homing pin, backs off, re-approaches, and moves on to the position from which joint 5 can home.
- Joint 5 homes against its switch, and joints 5 and 6 move to their after-homing positions together:
joint 5 by
j5_homing_offset, joint 6 back to the point where its sensor triggered. - The firmware sets every joint's counter to its after-homing value (
standby_positionin the firmware), and reports all six joints as homed.
A video of a correct homing: Homing reference. It takes about half a minute. The result is the after-homing pose: the standby pose turned 90° about joint 1, with joint 1 at +90° (Joint limits and directions).
Press Home. The response log reports the joints as they home; the position display and the simulator are right once all six are homed.
home() after power-up runs the referencing sequence. A later home() on a referenced robot is a
planned, collision-checked joint move back to the after-homing pose; home(calibrate=True) runs the sequence again.
Planned motion is refused with MOTN_NOT_HOMED until the robot is referenced.
If it goes wrong
Press the E-stop when a joint grinds at its end without stopping: its switch does not trigger. Joints 1, 4 and 6 use inductive sensors whose LED lights when they see metal; a sensor that does not light needs its trigger screw adjusted. If joint 6 keeps turning, its homing pin is not where the sensor looks. Homing failures has the cases.
Mastering
A homed robot stands within a few steps of the after-homing pose. The exact number of steps from each switch to the witness marks differs between builds; Mastering says how to measure and set it.
Comments
Found a mistake on this page? Edit it on GitHub · Report it · Get help · This page as Markdown · llms.txt · The whole manual as PDF