Jaws
The jaws bolt to the two carriers on the rail and are yours to adapt. The product repository has three designs, all in Gripper jaws attachment; each file is one jaw, mirrored in the slicer for the other side, except the solid jaw, which has a mirrored file.
| Design | File | Use |
|---|---|---|
| PETG body with a glued-on TPU pad | MSG_JAW_TPU_GLUE |
the recommended jaw: the soft pad deforms around the object and holds it better |
| Solid jaw | MSG_solid_jaw, MSG_solid_jaw_mirror |
one part, quick to print |
| Hollow jaw | MSG_JAW_HOLLOW |
lighter, and suited to multi-colour prints |
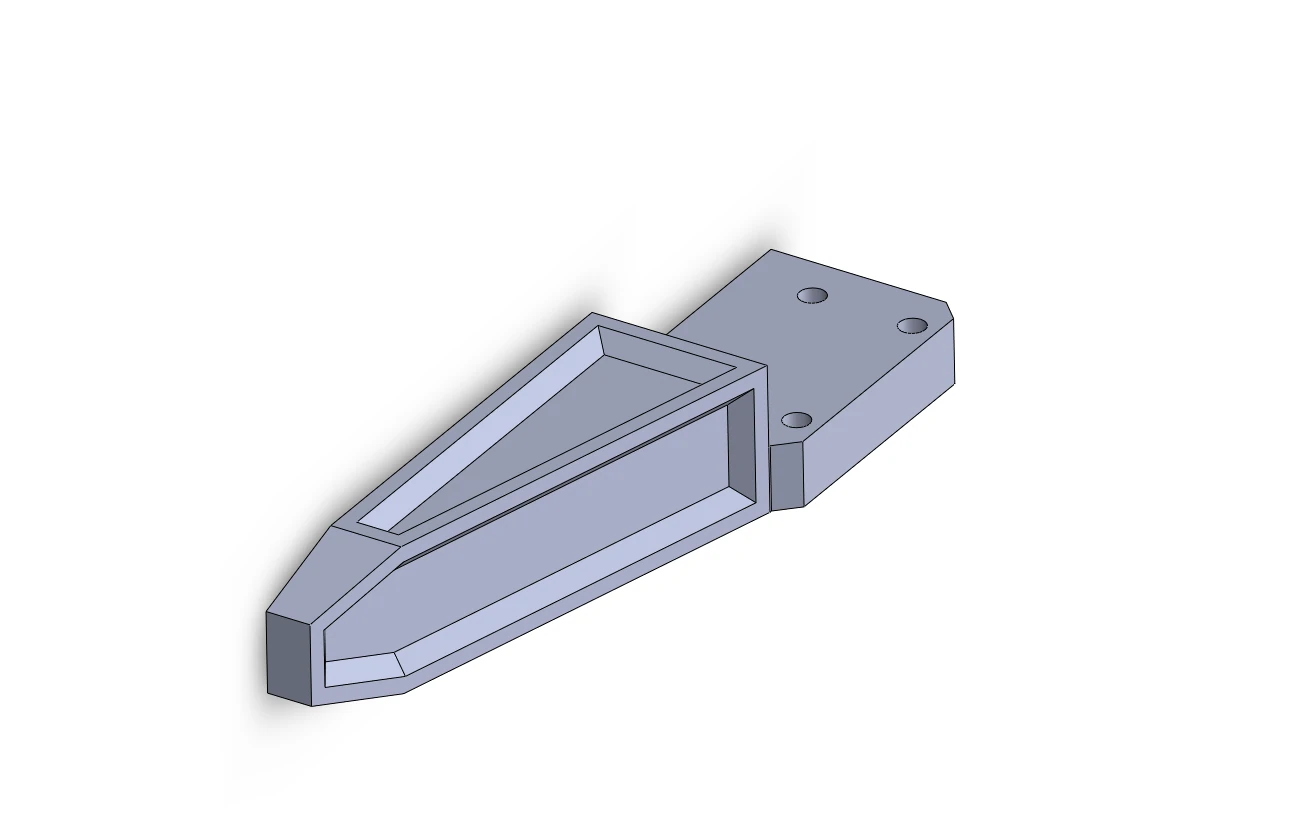
The TPU jaw
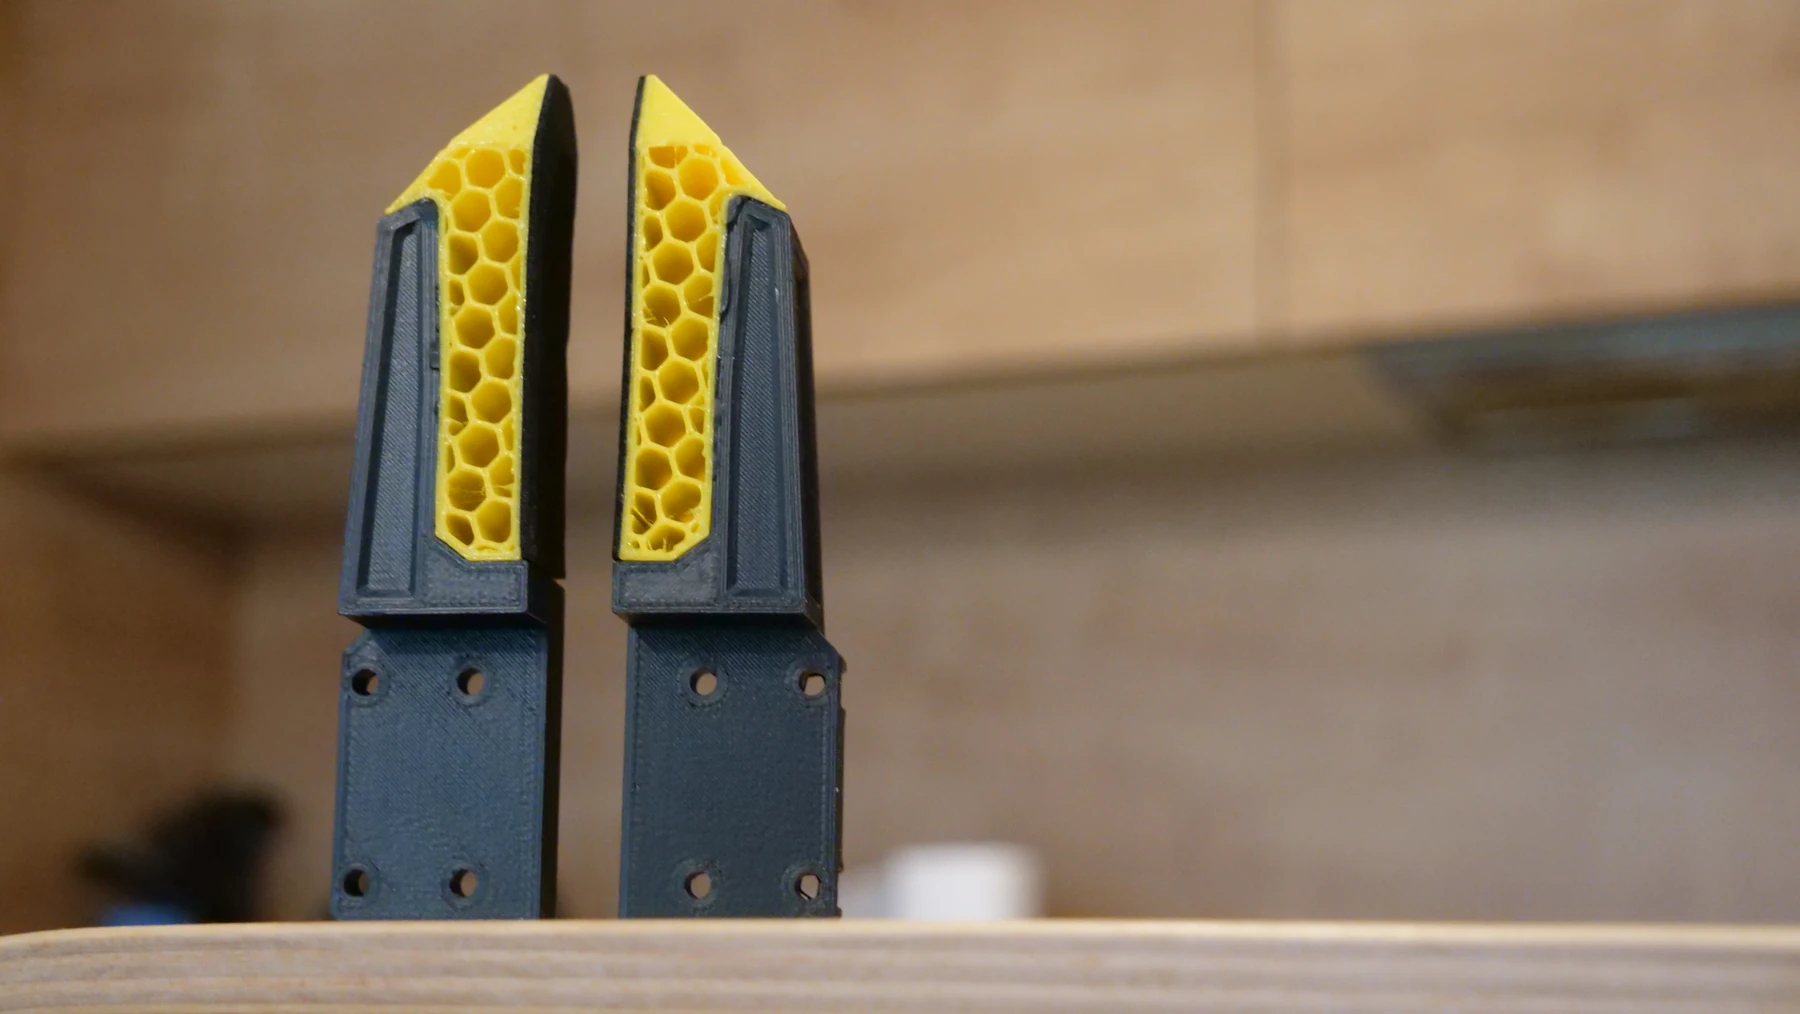
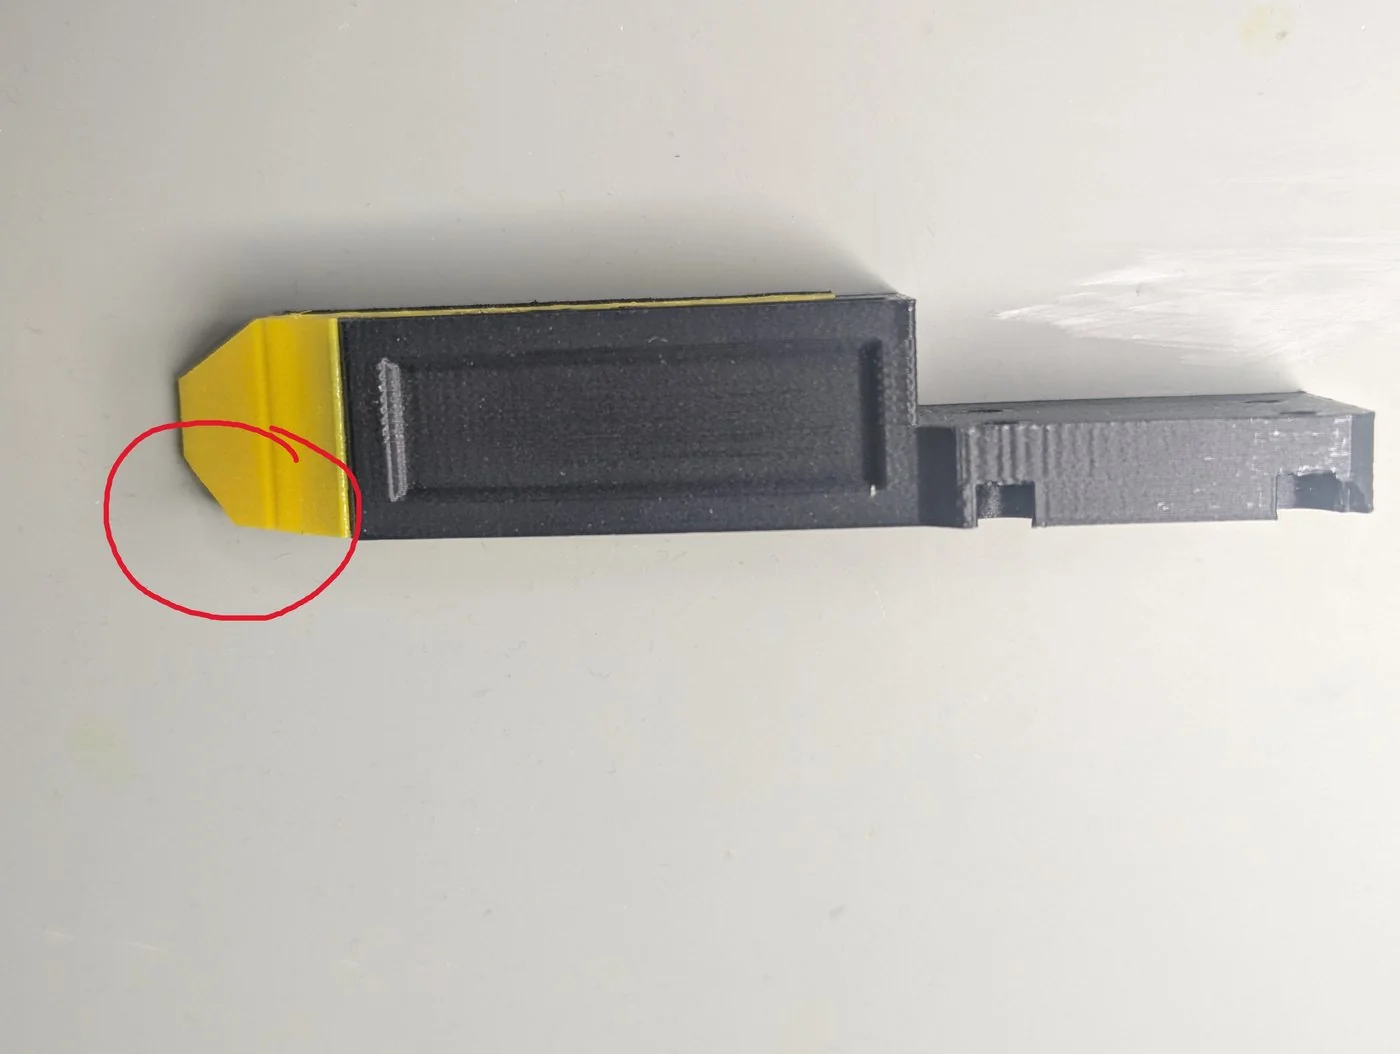
Print the body in PETG with your usual settings and the pad in TPU with 16 % infill, no top or bottom layers and two walls, for the softest pad. Then glue the pad to the body with ordinary super glue, in the orientation the pictures show: a pad glued the wrong way round leaves the jaws facing the wrong direction.
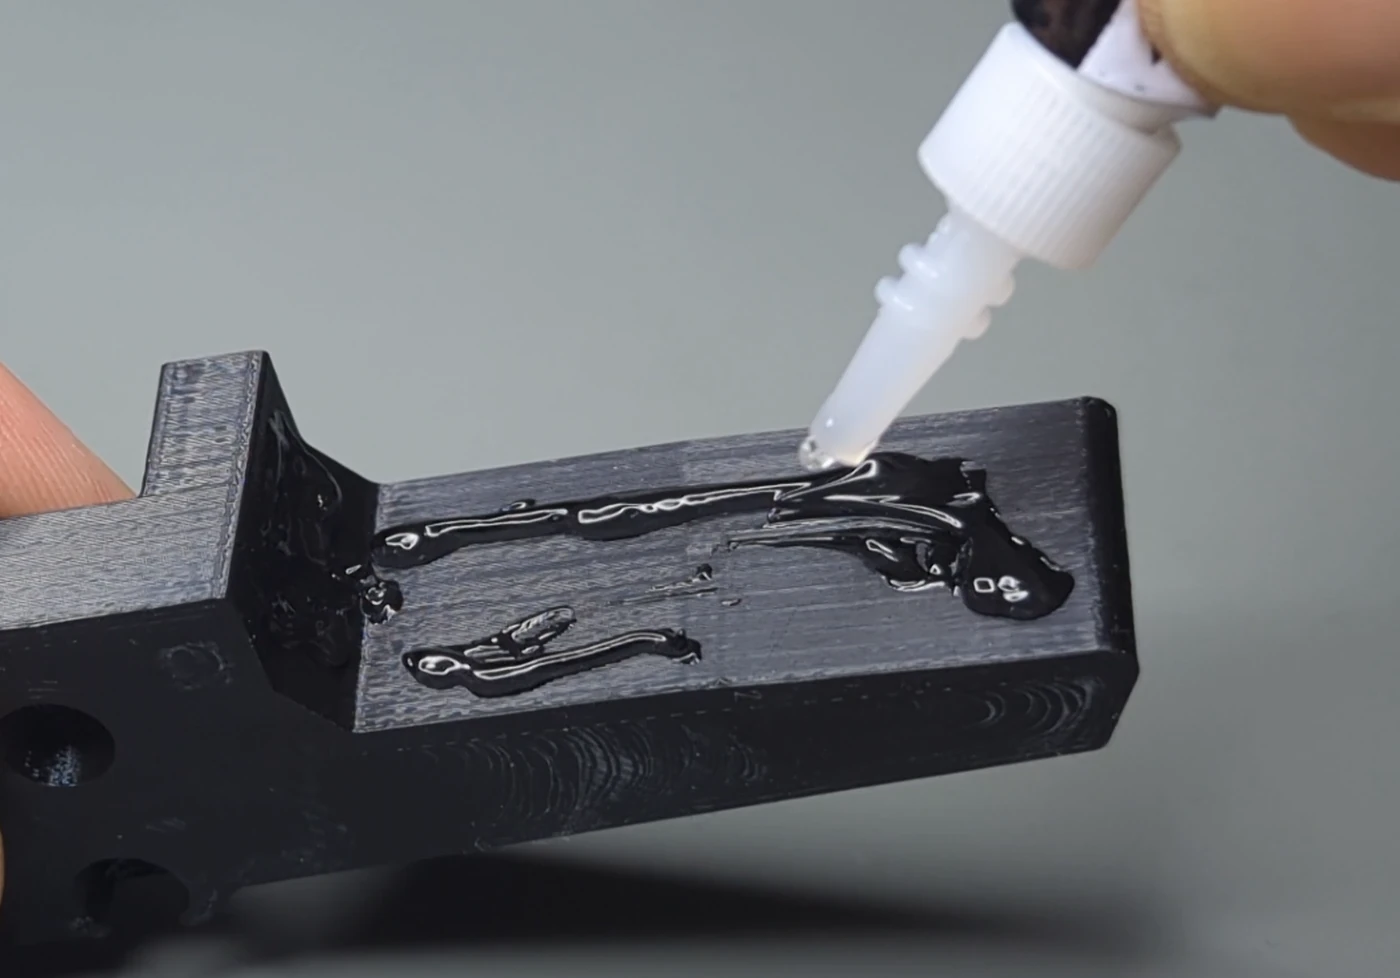
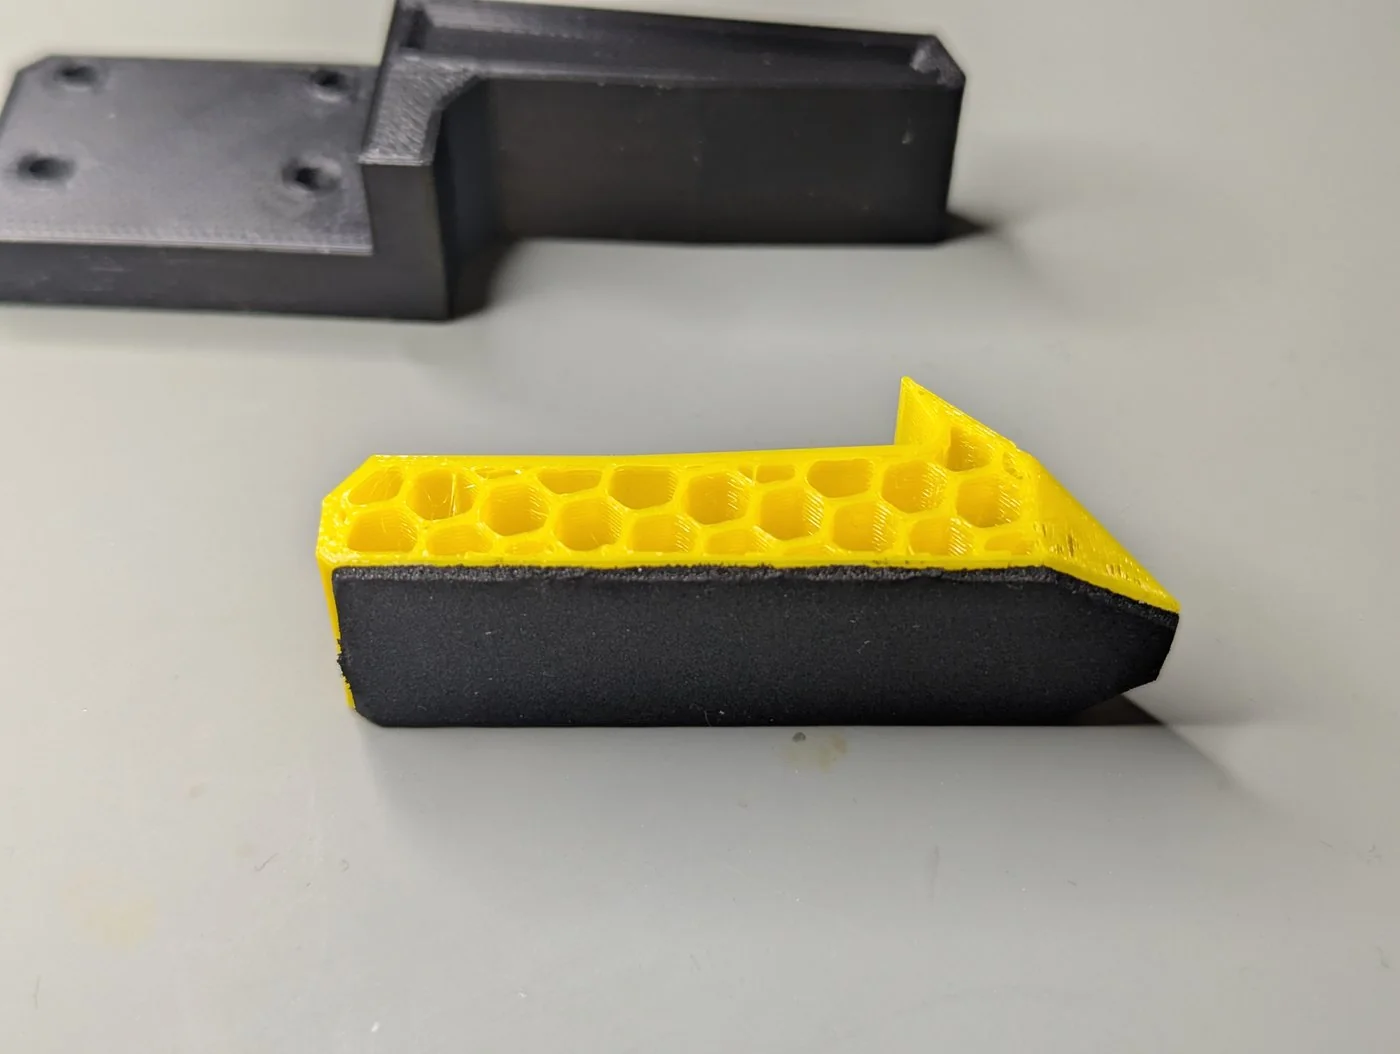
Sponge pads
A strip of 1 mm sponge tape (30 mm wide, in the BOM) on the gripping face of any jaw improves the hold on hard and smooth objects a great deal. Cut it to length, peel the backing and press it on.
Your own jaws
Keep the carrier's hole pattern from one of the designs and shape the rest for your objects. Long jaws multiply the lever arm on the carriers: keep them short and stiff, and remember that the grip force is set at the jaw faces, not at the rail.
Custom jaws on a PAR6
On a PAR6, custom jaws must keep the size of the original jaws: no longer, no wider and no thicker. The PAR6 software works with the gripper's original dimensions (its collision model of the tool and the tool centre point), so a larger jaw reaches where the robot does not expect it.
Calibrate after changing the jaws
The gripper calibration finds the end stops with the jaws fitted; jaws that meet earlier or later than the old ones change where 255 is. Calibrate again after a change, which happens at the next power-up anyway.
Comments
Found a mistake on this page? Edit it on GitHub · Report it · Get help · This page as Markdown · llms.txt · The whole manual as PDF