The GUI
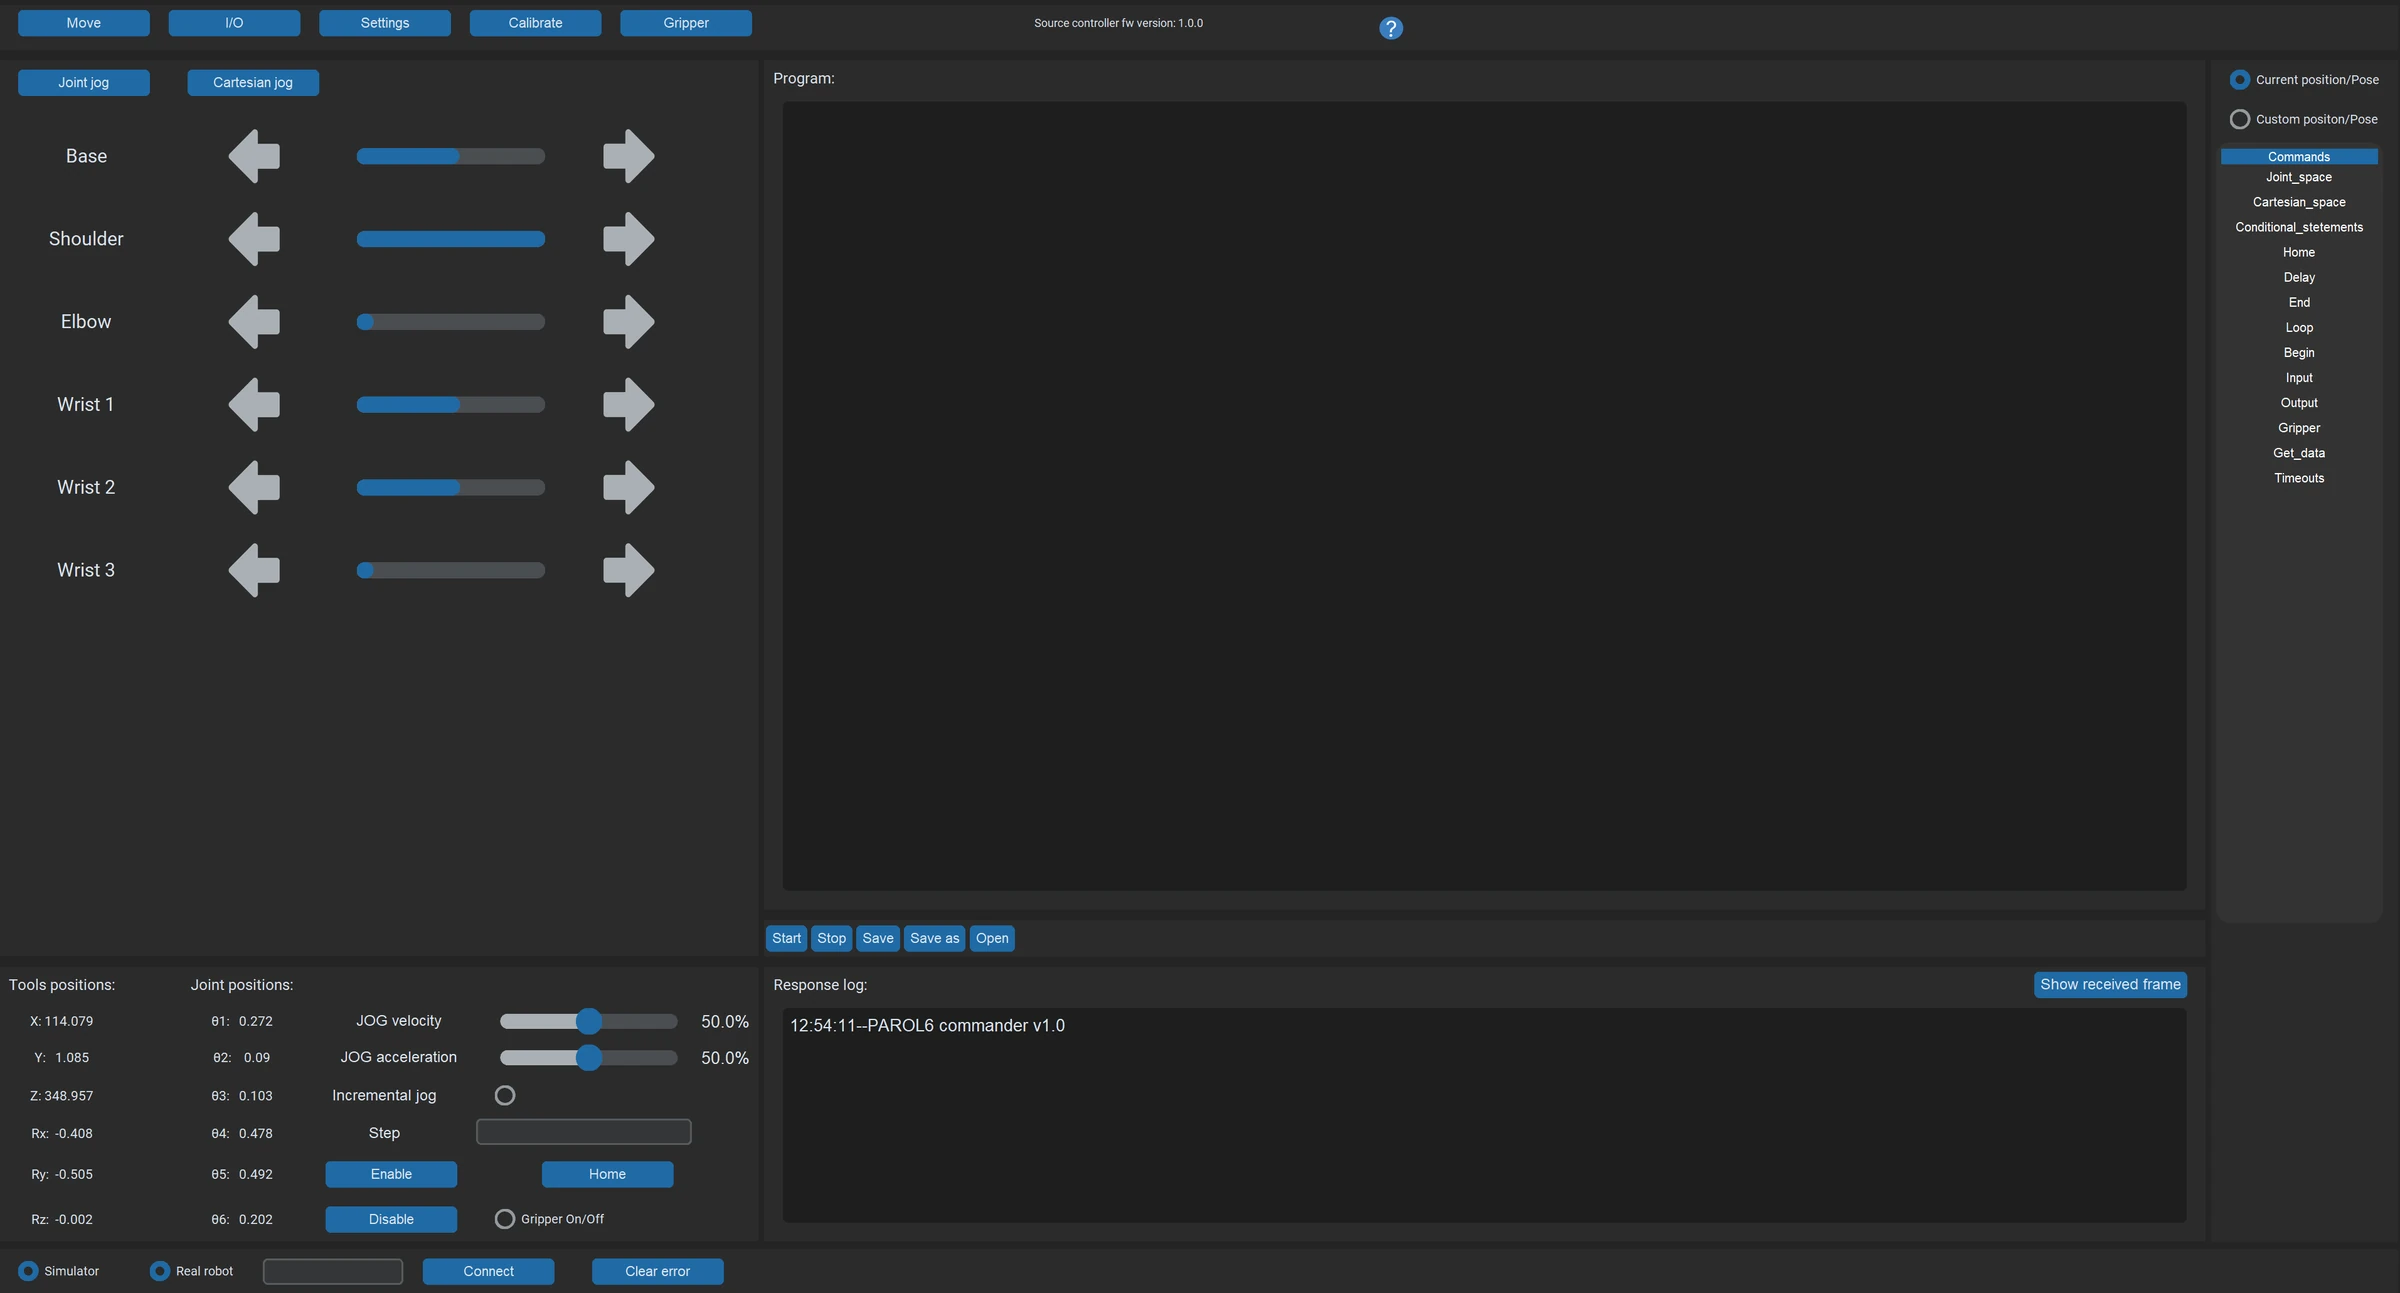
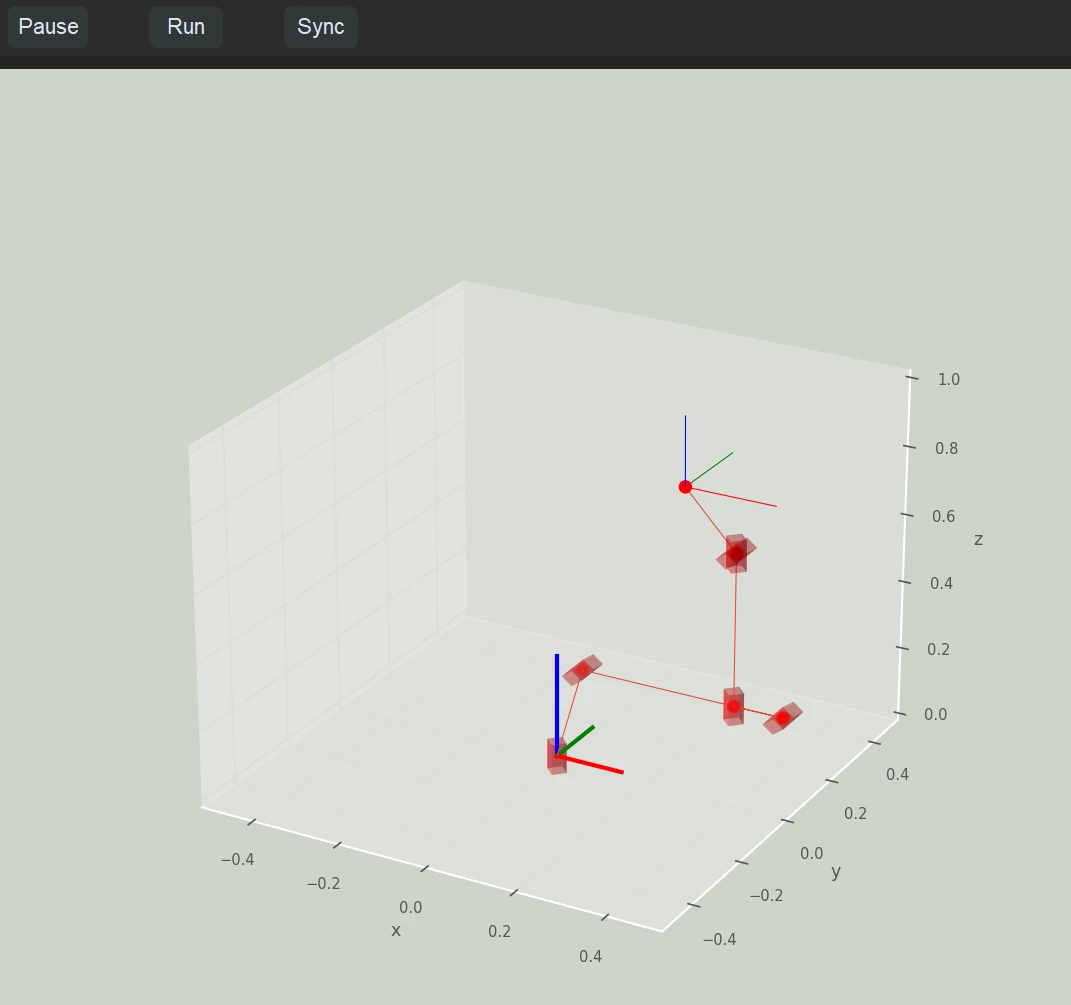
Two windows: the commander, where everything is done, and the simulator, a 3D view of the robot that follows it once the robot is connected and homed.
Connecting

At the bottom: the serial port field and Connect. COMx on Windows, ttyACMx on Linux. The response log
starts showing the robot's data when the connection is up; press Connect again if it does not. The Simulator
and Real robot buttons have no function at present. Clear error resets the homing state; unlike
Enable it does not re-enable a disabled robot.
The Move menu
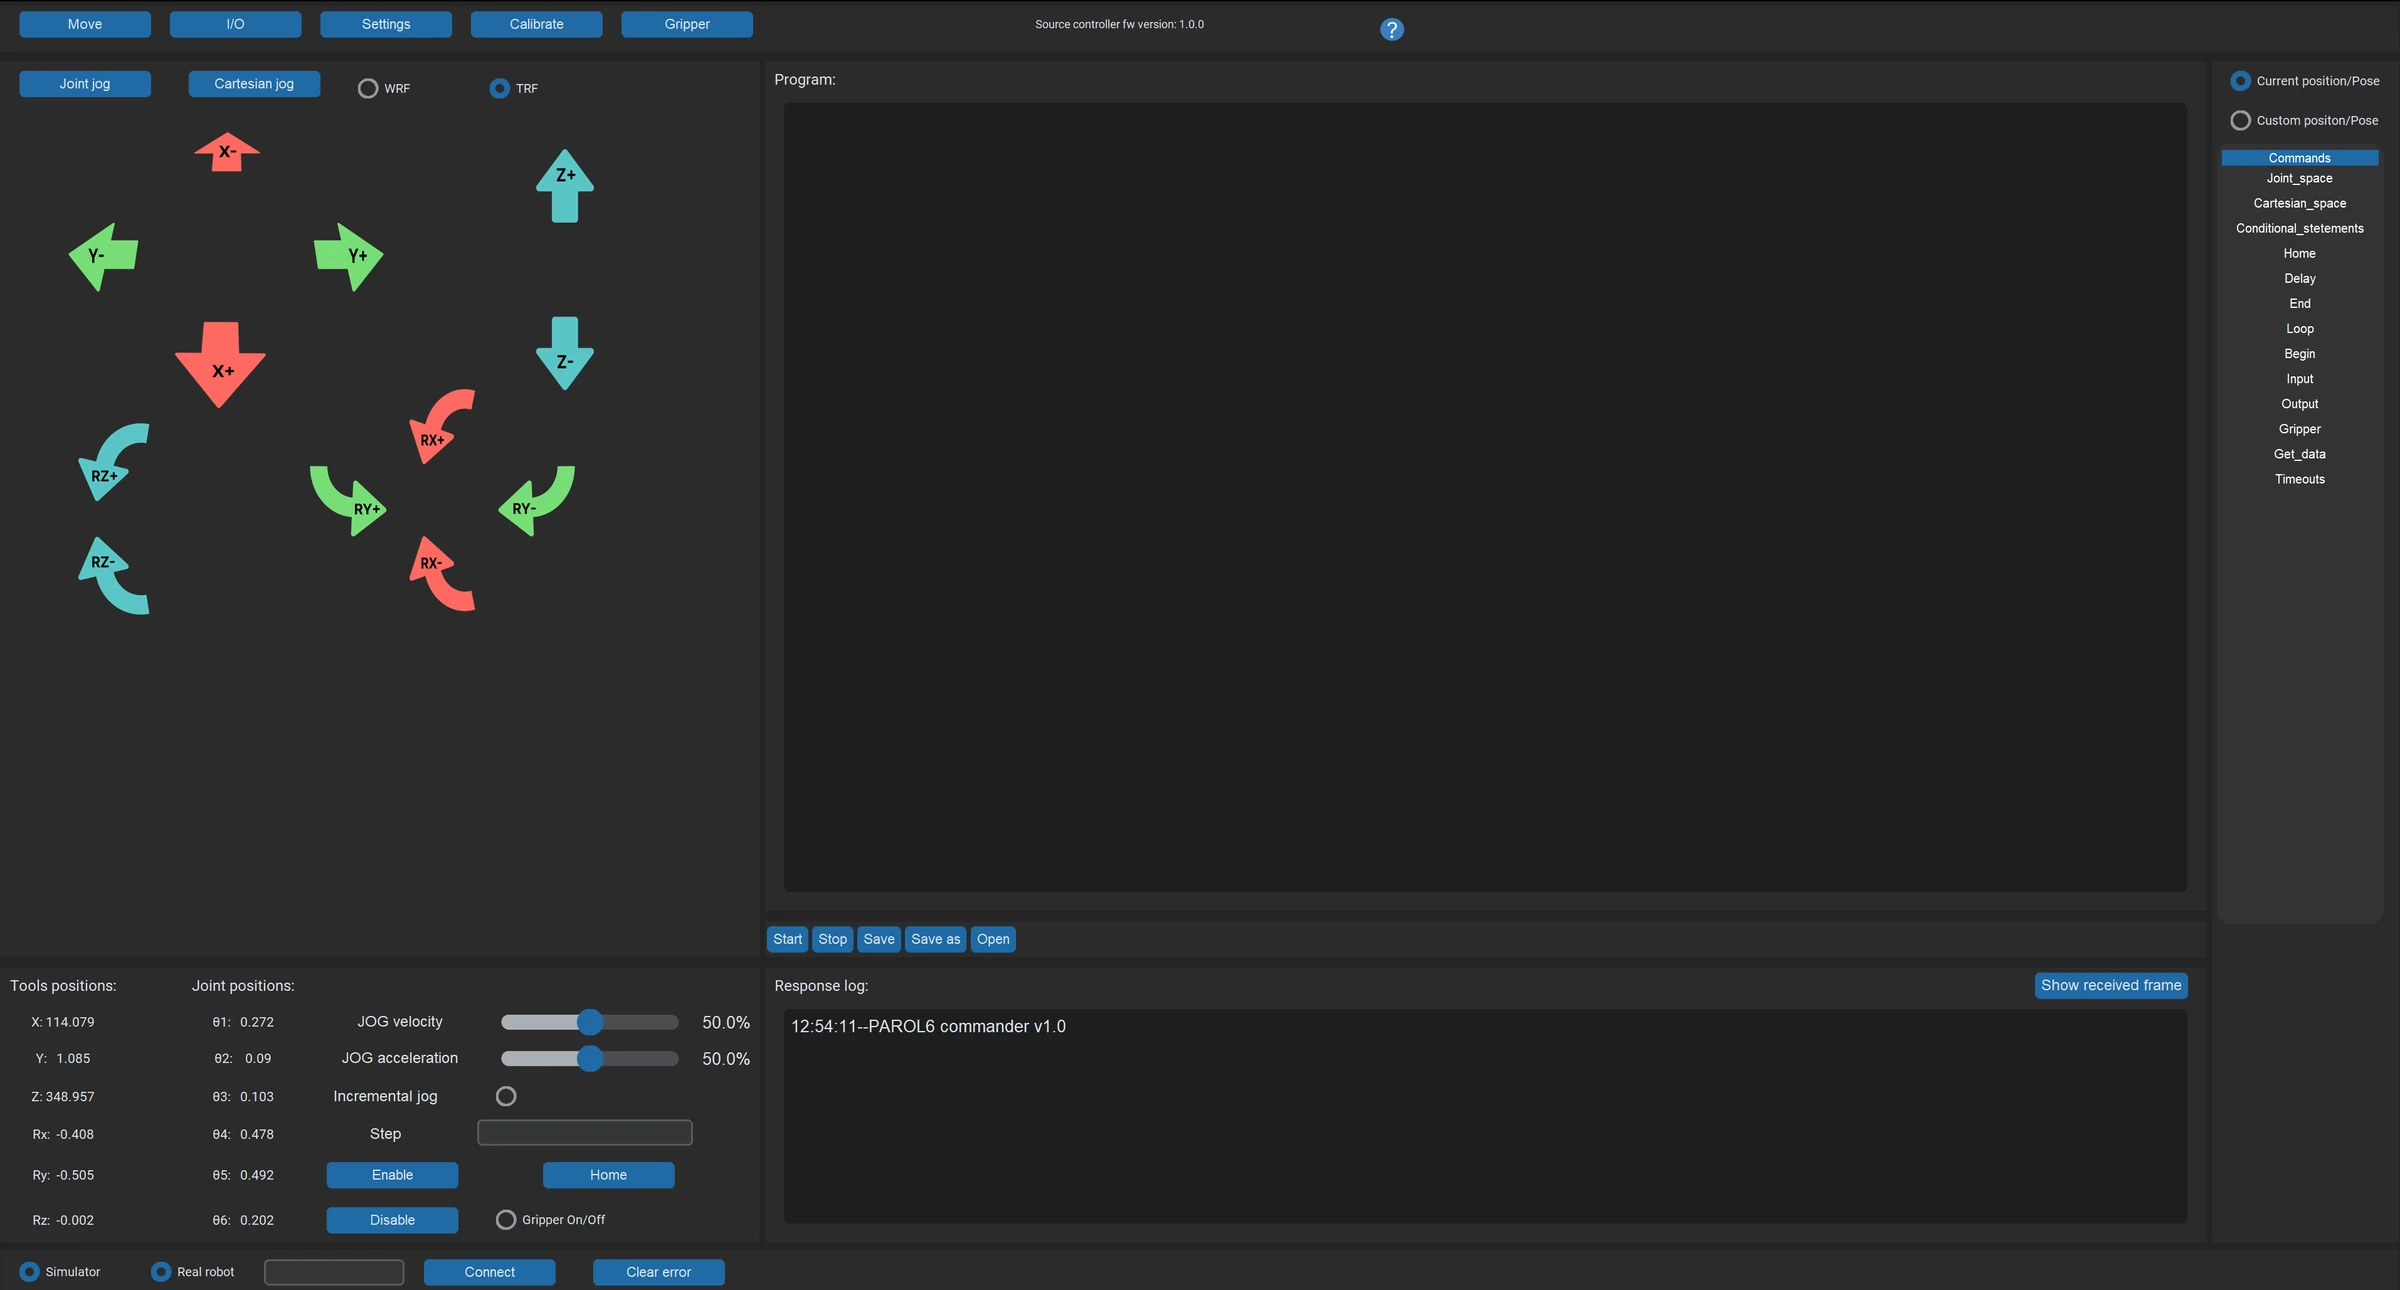
The left part of the window is the jog menu, with two variants:
Joint jog: six pairs of arrows, left for the positive direction and right for the negative. The speed slider below sets the jog speed as a percentage; it affects jogging only, not programs. Works before homing.
Cartesian jog: X, Y, Z and the rotations, in the WRF (the base) or the TRF (the tool), chosen with the switch; TRF is the default. The rotation buttons only work in the TRF: in the WRF they do nothing. Home the robot first (the software does not check), and the jog stops at a singularity (Configurations and singularities).
The robot position
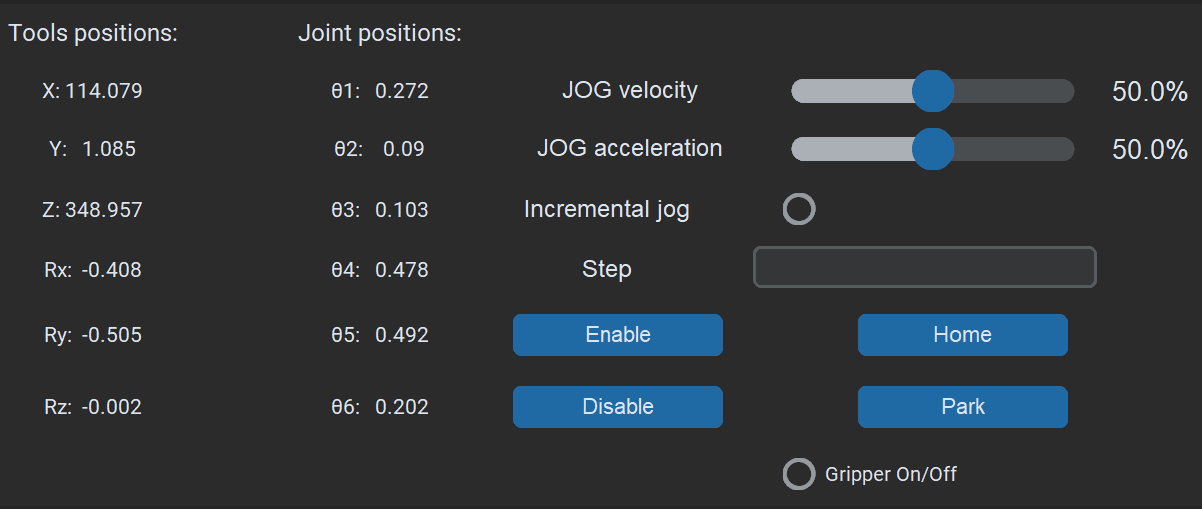
The six joint angles and the tool pose in the WRF, live. Home starts the homing sequence; Enable clears
errors and enables the robot; Disable disables it, the motors still holding. Park does not move the
robot: it inserts a three-line program at the cursor of the program window, Begin(), a MoveJoint to the park
pose with t=4, and End(), which you then run with Start.
The program window
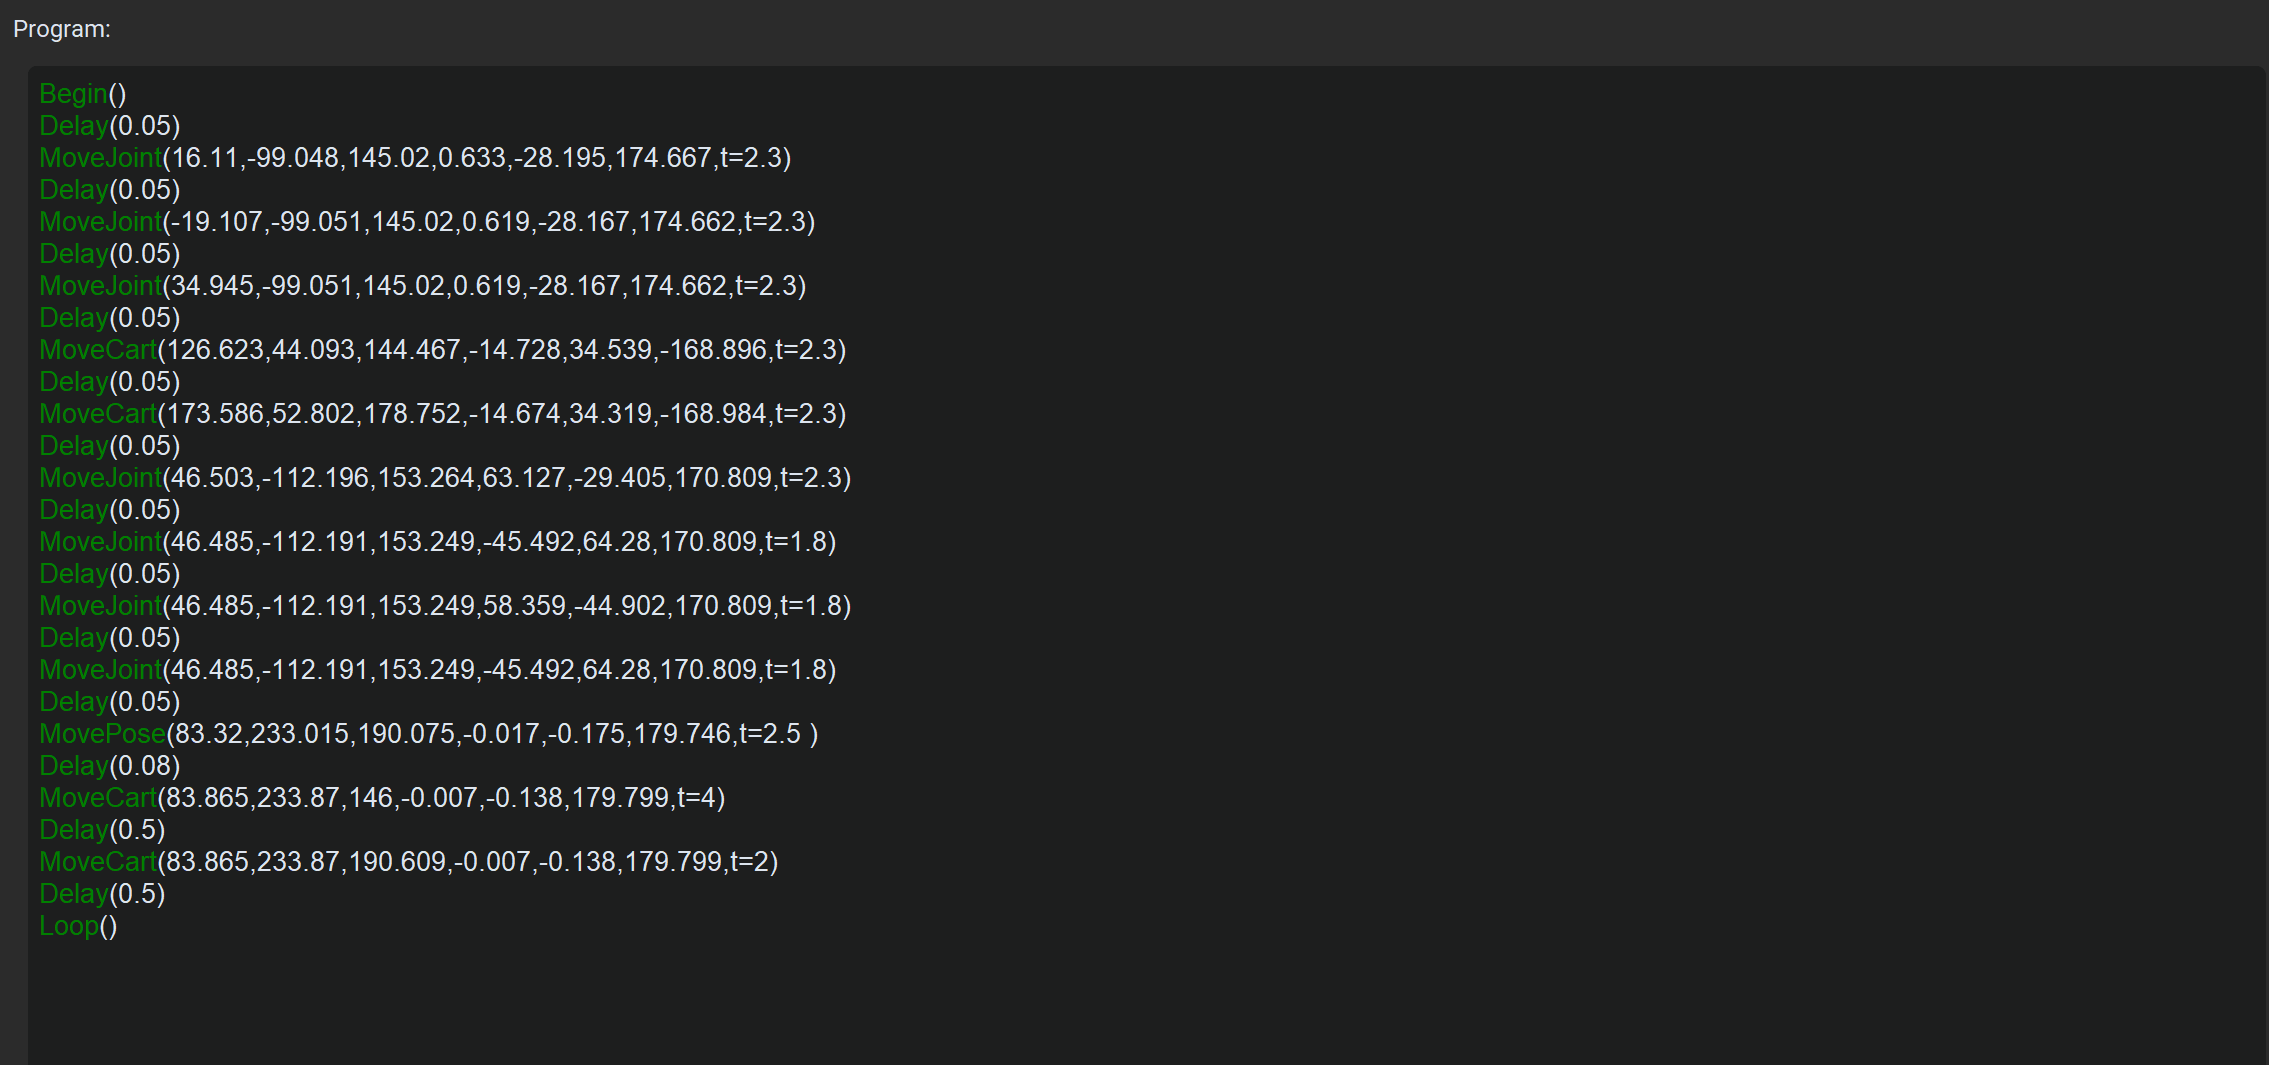
An RBTscript program, one command per line (RBTscript). Start runs it from Begin(),
Stop halts it. Start first saves the editor's text: into the file you opened, if any, overwriting it,
and into Programs/execute_script.txt.
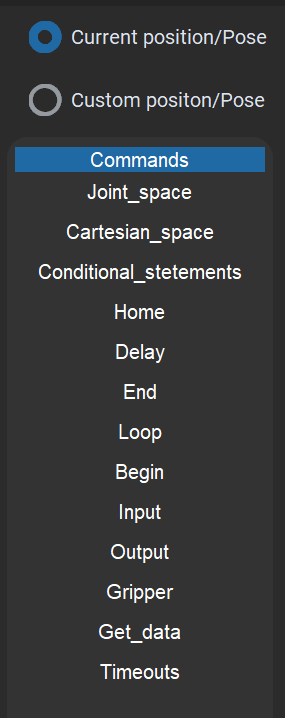
The command list inserts a command at the cursor: with Current selected, a motion command is inserted with the robot's current joint angles or pose as its arguments, which is how you teach a pose; with Custom the arguments are left for you.
The response log

What the robot and the program are doing, and why a command was refused: the first place to look when something does not happen (Errors and recovery).
The IO tab
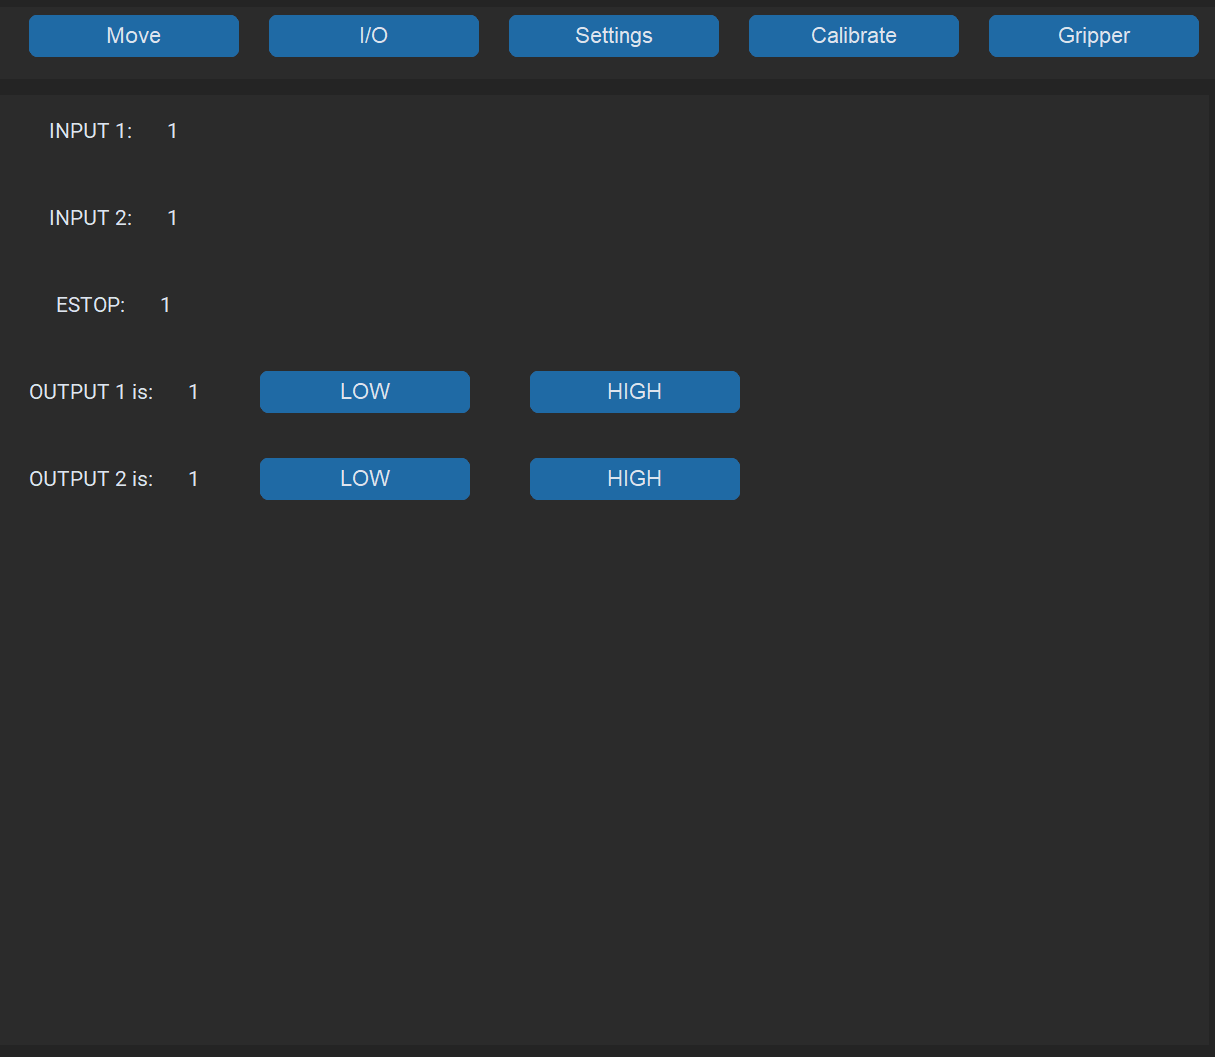
The state of the two inputs, and buttons for the two outputs.
The Gripper tab
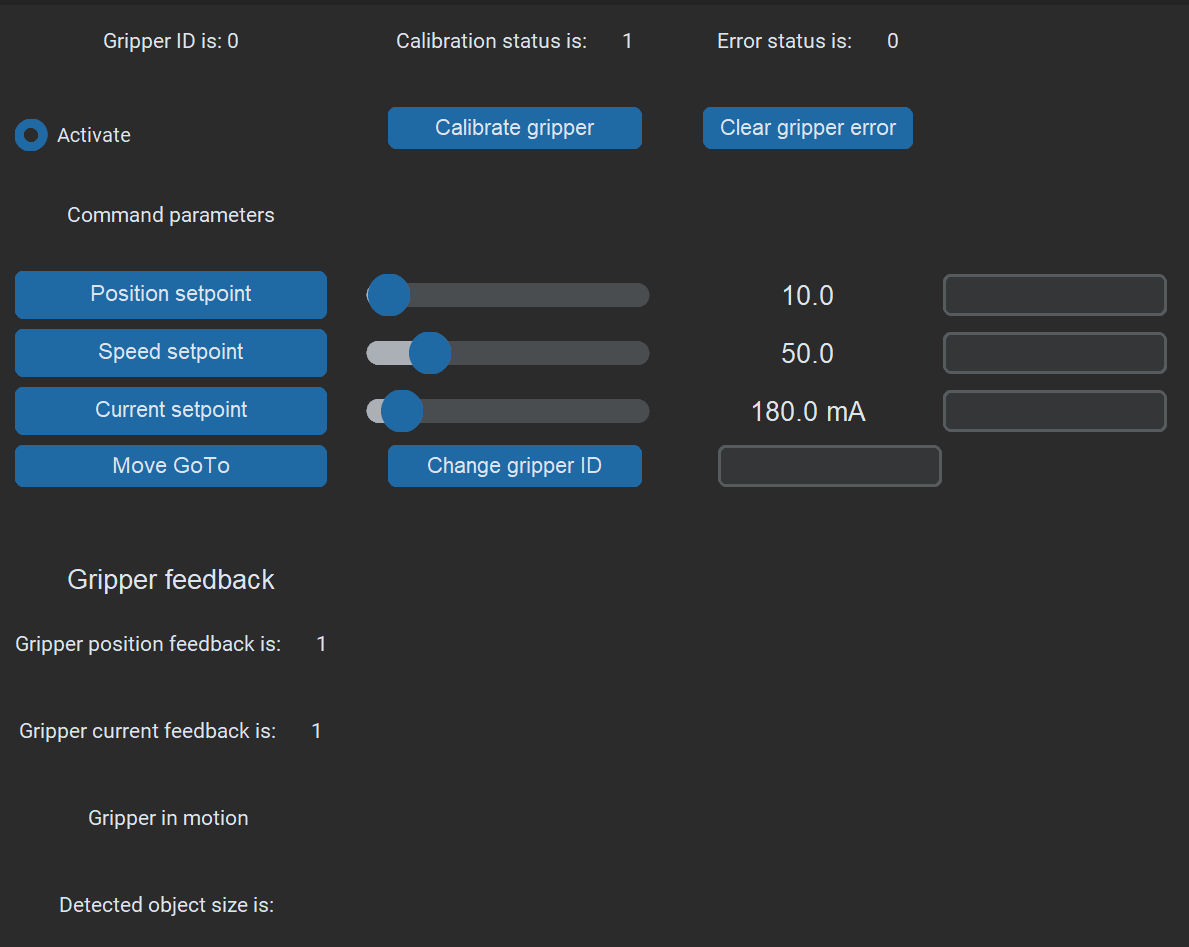
For the SSG-48 and MSG grippers. After homing: Clear gripper error, then Calibrate gripper, then wait until
the tab shows Calibration status is: 1 (about 3 s for the SSG-48, 5 to 6 s for the MSG on its longer rails).
Then set the position, speed and current with the sliders and press Move GoTo. The feedback section shows the
gripper's position and current, its calibrated and E-stop error bits, and its whole status byte as a number
(labelled Gripper object detection is). Change gripper ID sets the CAN ID the board addresses, 0 as the
grippers ship.
The Calibrate and Plot buttons
The menu also has Calibrate and Plot. Both open the same panel, with Disable motor, Enable motor, Go to limit and a joint menu; none of them does anything in the current version.
The Settings tab
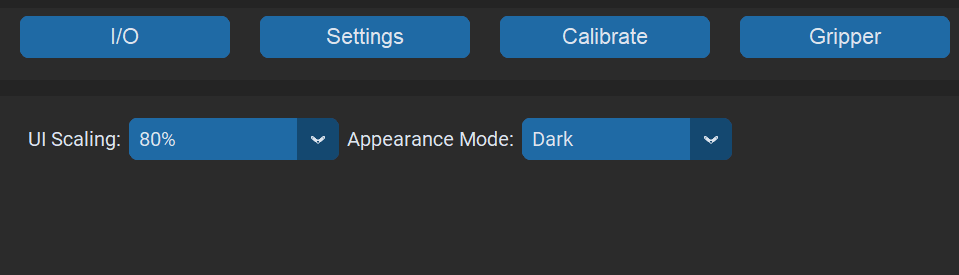
Dark or light mode, and the scaling of the GUI for your display.
The terminal
The terminal the program was started from prints a block of data every few seconds: the positions and speeds
from the robot, the homed, I/O and error bytes, the timing, the gripper data, the commanded data and the GUI's
state. Time between 2 commands in ms is the one to watch: near 0.010 is right. The value is in seconds, whatever
the label says: 0.010 is the 10 ms cycle.
Comments
Found a mistake on this page? Edit it on GitHub · Report it · Get help · This page as Markdown · llms.txt · The whole manual as PDF