Connectors and pinout
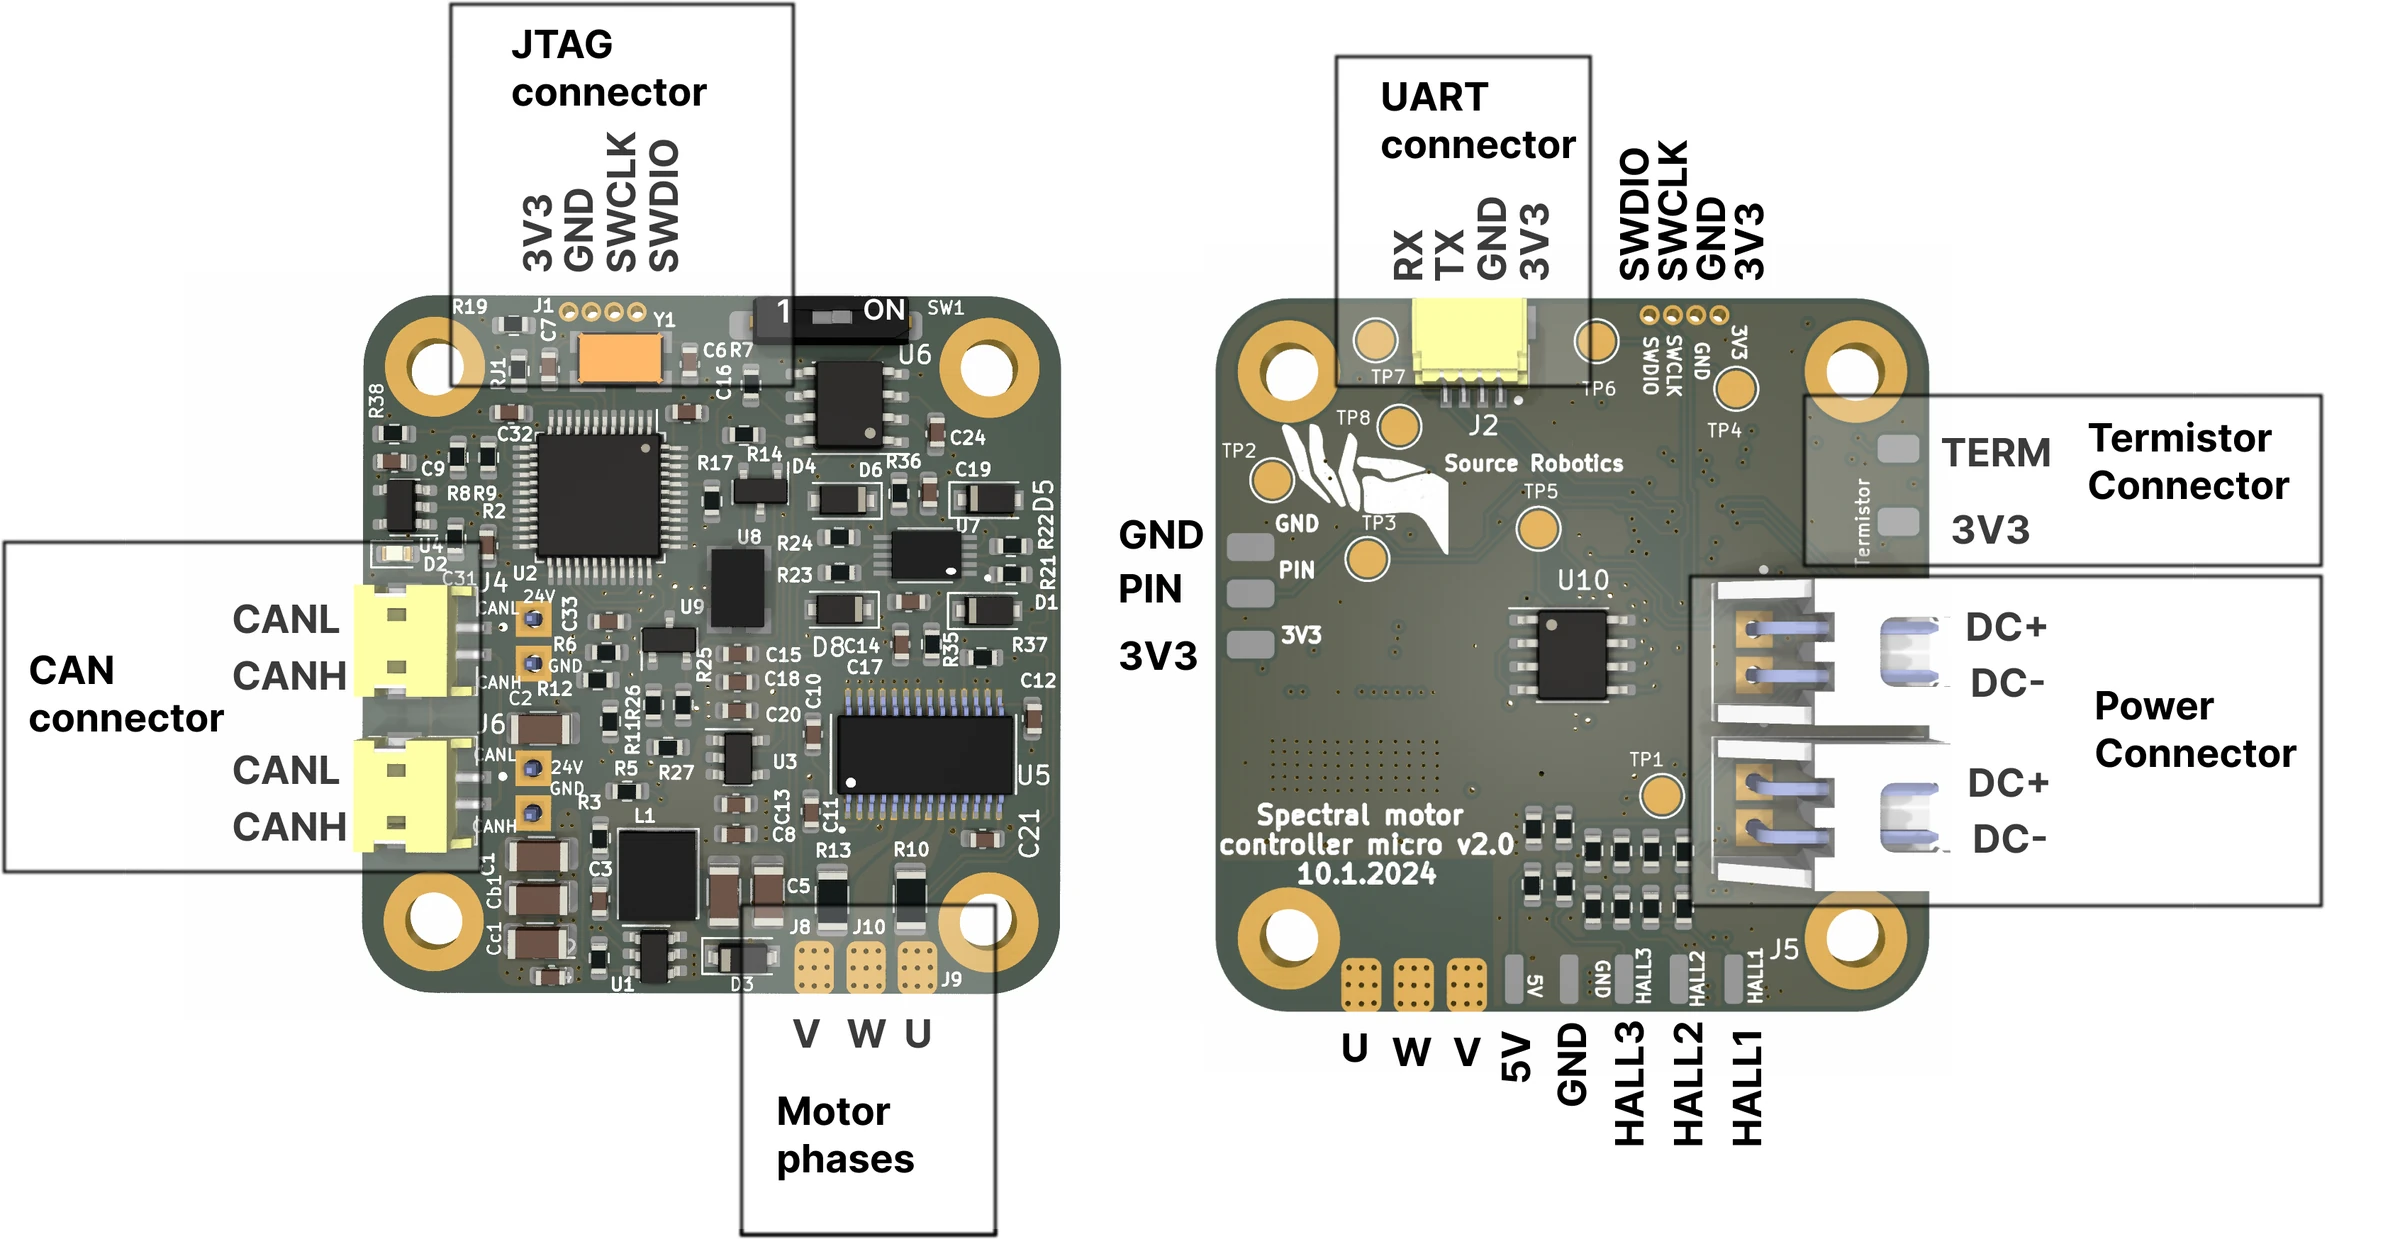
| Connector | Pins | Type | Cable |
|---|---|---|---|
| Motor | U, V, W | solder pads, three per phase | the motor's own leads, see Wiring the motor |
| Power, two of them | DC+, DC− | JST XH, 2 pins | Power cable; the second connector feeds the next driver |
| CAN, two of them | CANL, CANH | JST ZH, 2 pins | CAN cable; the second connector feeds the next driver |
| UART | 3V3, GND, TX, RX | JST SH, 4 pins | UART cable |
| Thermistor | TERM, 3V3 | solder pads | the 100 kΩ NTC from the shop or any 100 kΩ NTC, see Thermistor |
| JTAG | 3V3, GND, SWCLK, SWDIO | 1.27 mm pads | Programming adapter, pressed onto the pads |
| PIN | GND, PIN, 3V3 | solder pads | your own signal: an analog input or a digital input/output, 3.3 V |
| HALL | 5V, GND, HALL1, HALL2, HALL3 | solder pads | hall sensors: not implemented in the firmware, see the note below |
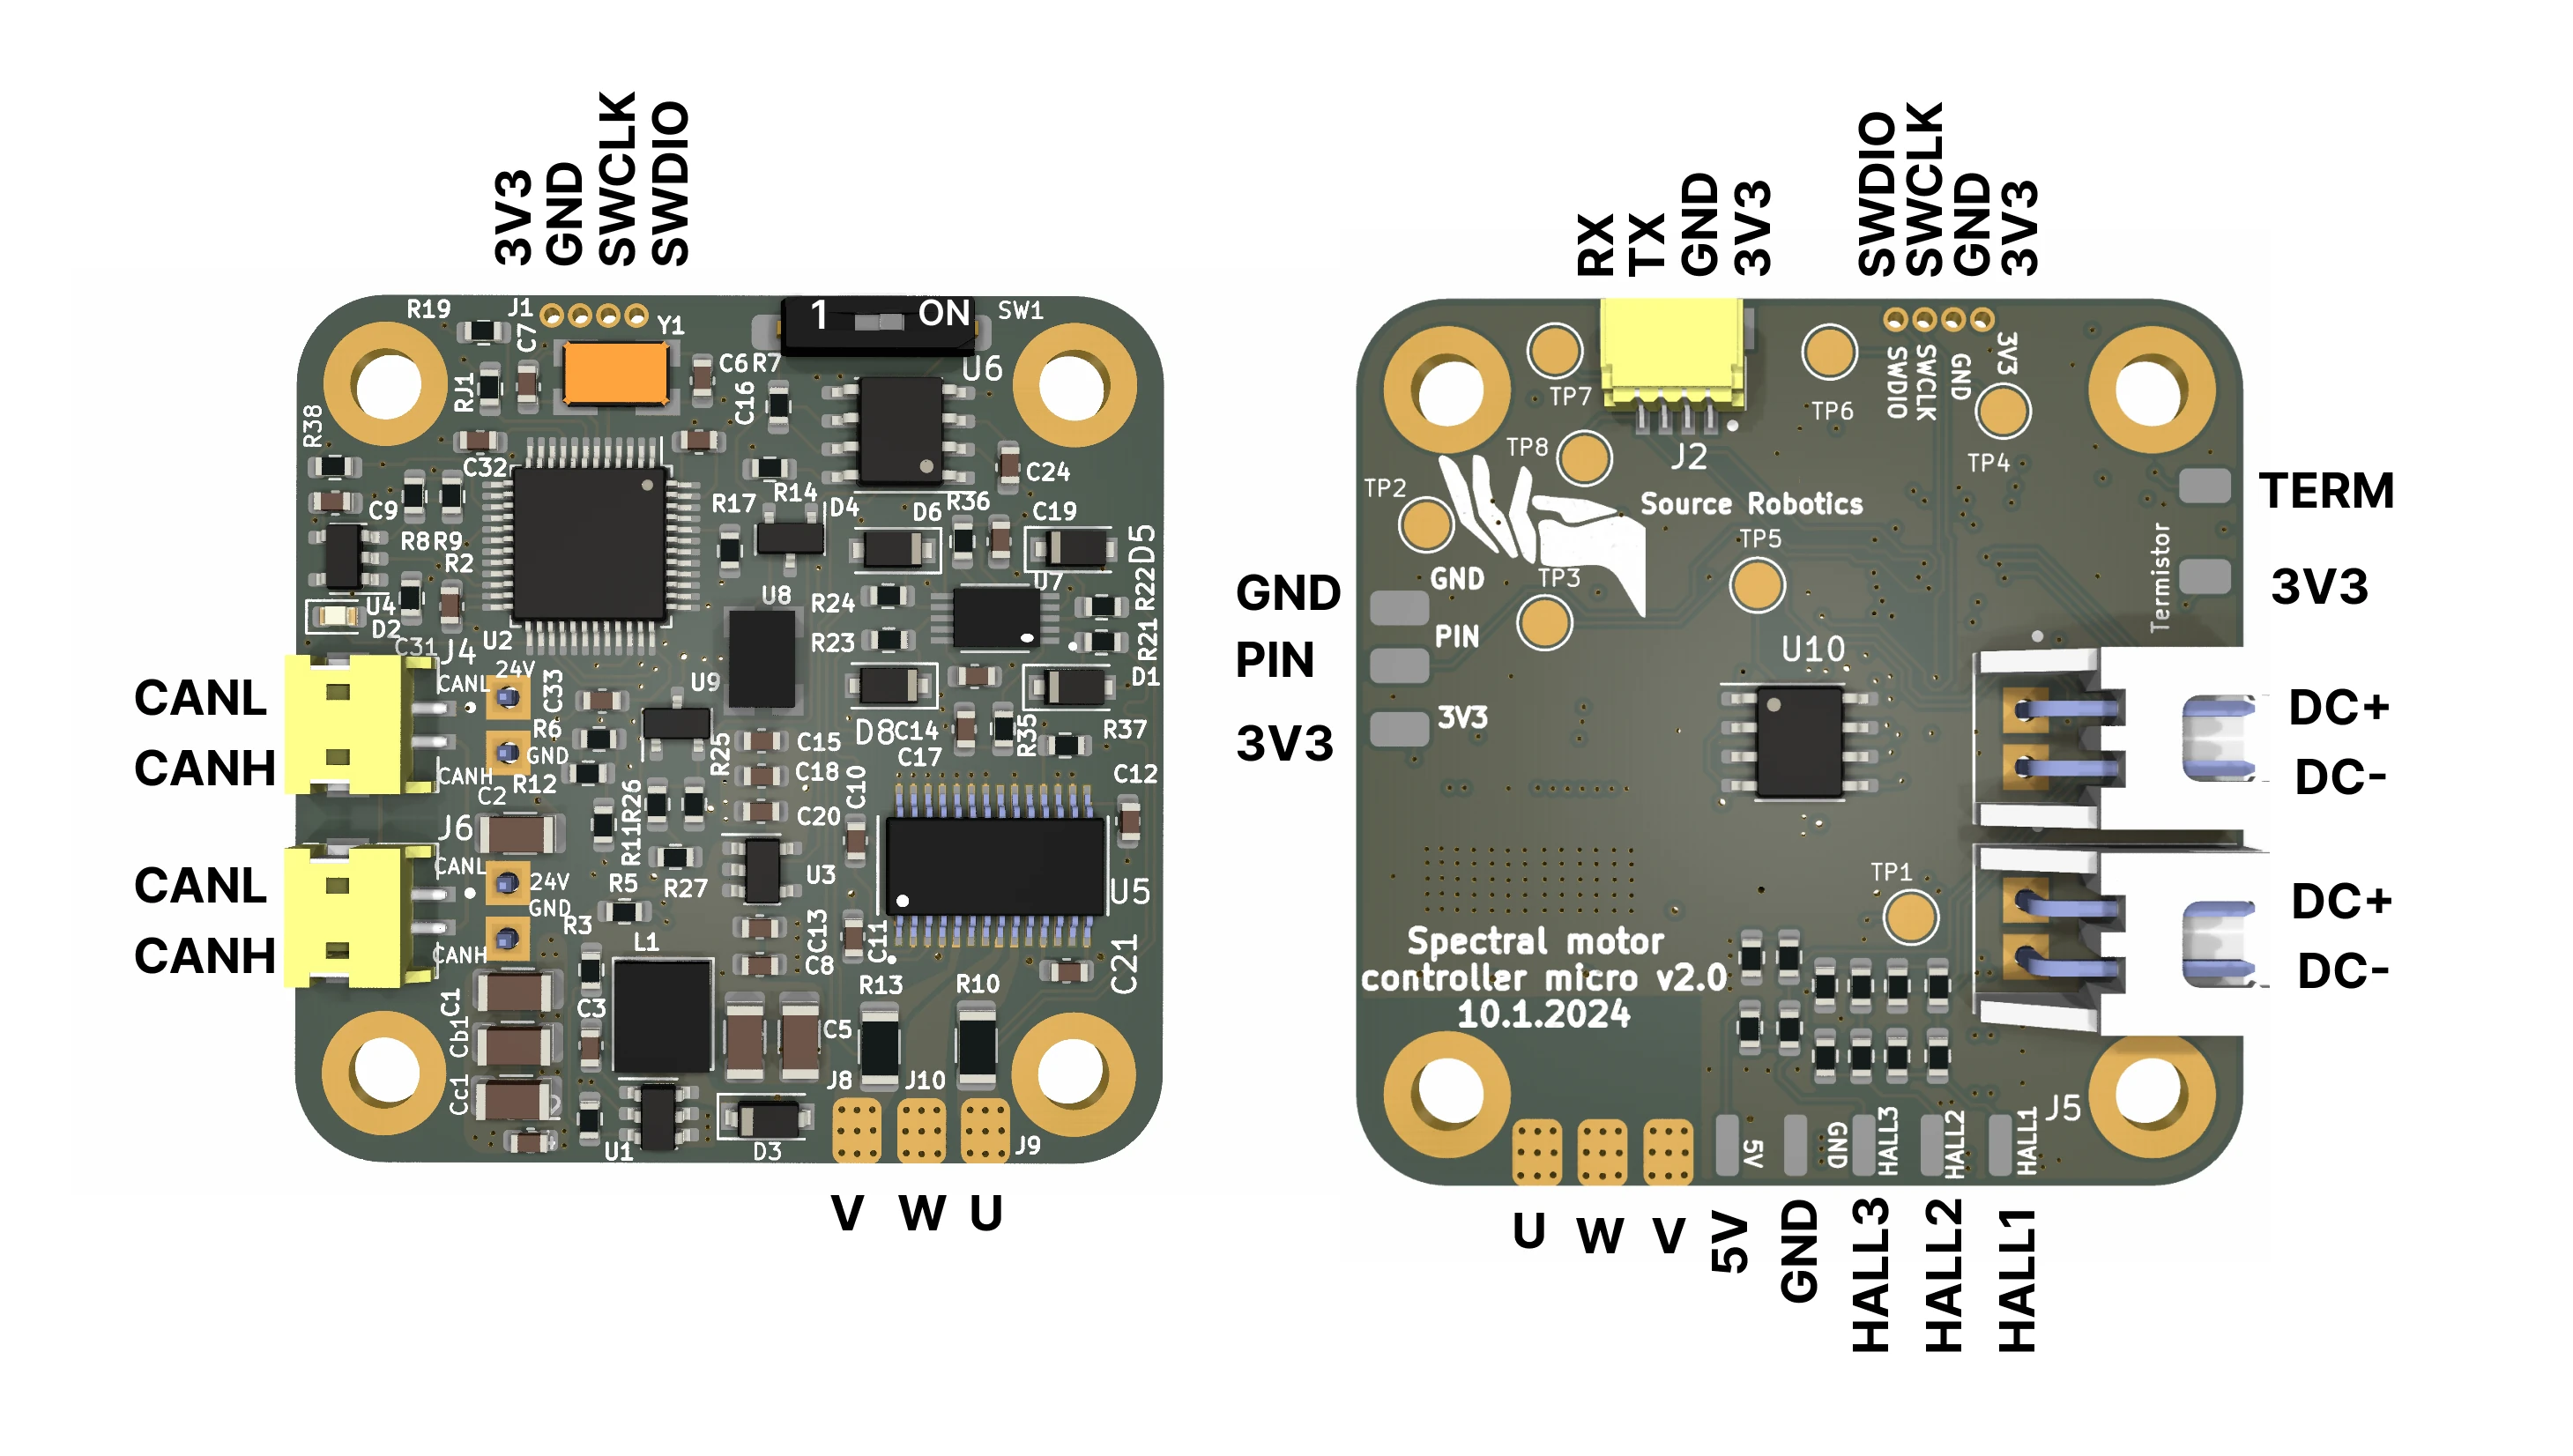
Hall sensors are not implemented
The HALL header and the twelve resistor pads above it are on the board for hall-sensor commutation, but the Spectral firmware does not implement it: the magnetic encoder is the only position source. Leave the header unpopulated.
Polarity and orientation
DC+ to the positive supply, DC− to the negative; a cable the wrong way round destroys the driver. The daisy-chain cables have an orientation too: see Power and the CAN daisy chain.
Note
- UART is TX to RX and RX to TX between the driver and the adapter.
- The UART port and the PIN header are 3.3 V. 5 V on either destroys the board.
- The thermistor pin has a 54.9 kΩ pull-down; the firmware's temperature table is for a 100 kΩ NTC.
- The CAN termination switch is next to the CAN connectors; ON connects the 120 Ω resistor.
- The encoder chip sits on the bottom of the board, in the middle: that side faces the magnet.
Comments
Found a mistake on this page? Edit it on GitHub · Report it · Get help · This page as Markdown · llms.txt · The whole manual as PDF